Hyundai Elantra: Body (Interior and Exterior) / Floor Console
Components and Components Location
| Components |
| [M/T] |
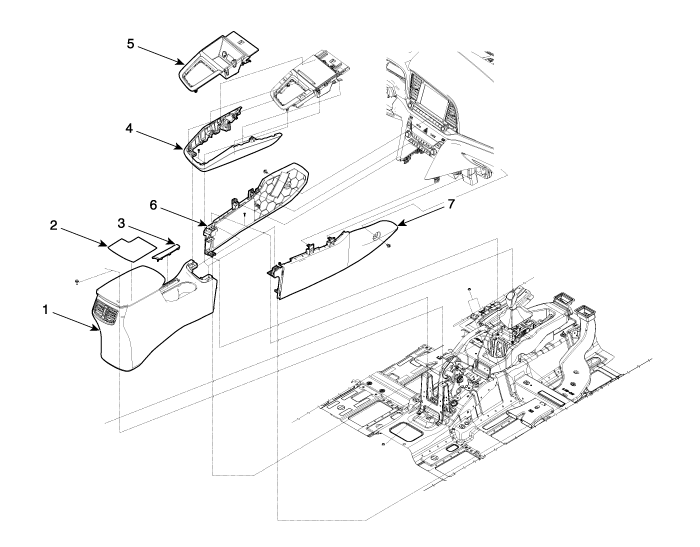
| 1. Floor console assembly 2. Console tray mat 3. Parking brake cover 4. Console garnish assembly | 5. Console upper complete assembly 6. Front console side cover [LH] 7. Front console side cover [RH] |
| [A/T] |
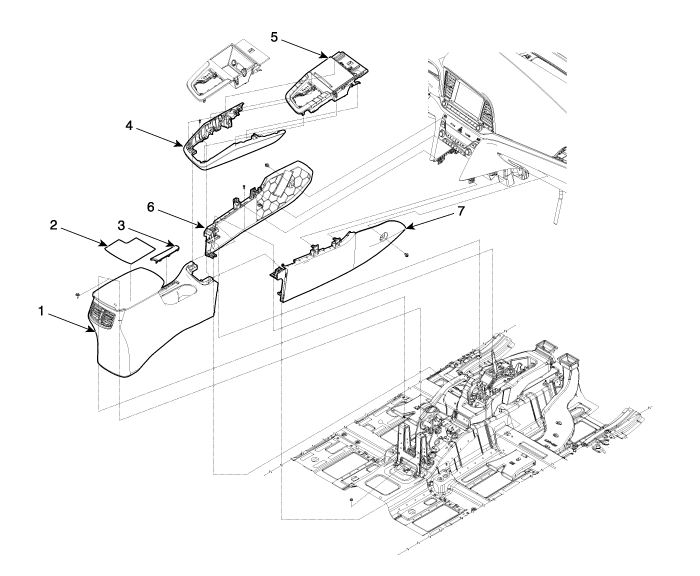
| 1. Floor console assembly 2. Console tray mat 3. Parking brake cover 4. Console garnish assembly | 5. Console upper complete assembly 6. Front console side cover [LH] 7. Front console side cover [RH] |
Floor Console Assembly Components and Components Location
| Component Location |
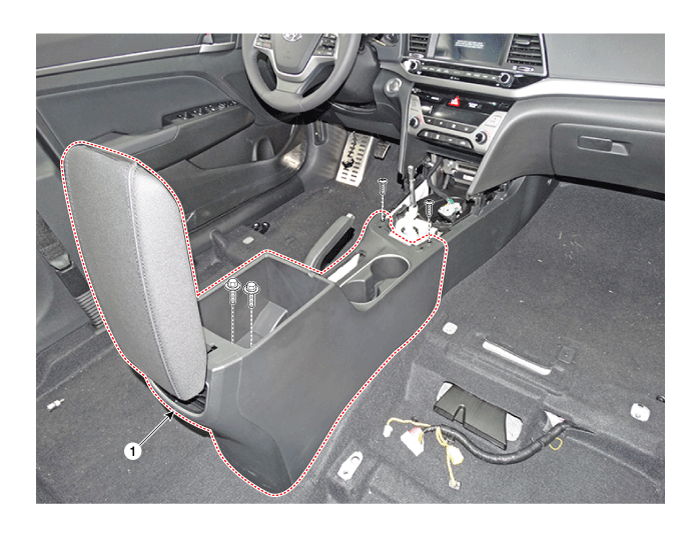
| 1. Floor console assembly |
Floor Console Assembly Repair procedures
| Replacement |
| [M/T] |
|

|
| 1. |
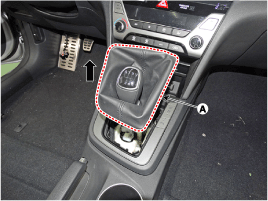
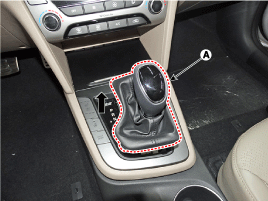
Remove the gear knob & boots (A) pull both of it up.
|
| 2. |
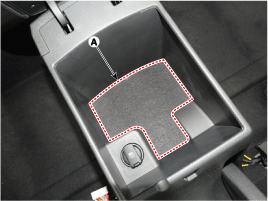
Remove the rubber mat (A).
|
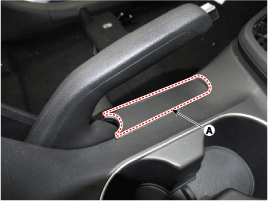
| 3. |
Using a screwdriver or remover, remove the parking brake cover (A).
|
| 4. |
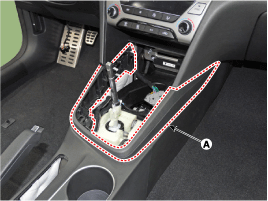
Using a screwdriver or remover, remove the console upper cover (A).
|
| 5. |
Disconnect the connector (A).
|
| 6. |
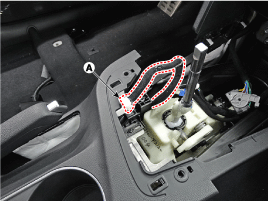
Using a screwdriver or remover, remove the console garnish (A).
|
| 7. |
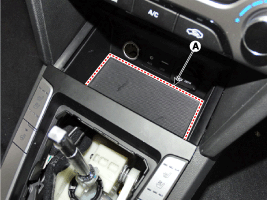
Remove the storage box pad (A).
|
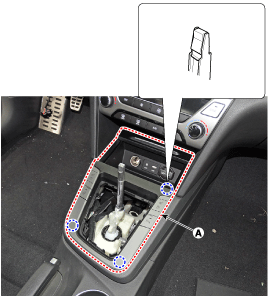
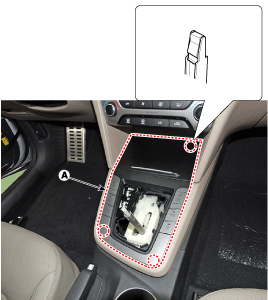
| 8. |
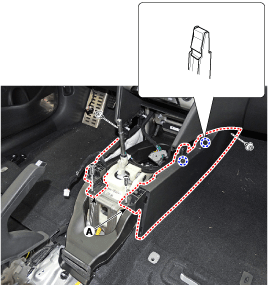
After loosening the mounting screws and bolts, remove the console rear complete assembly (A).
|

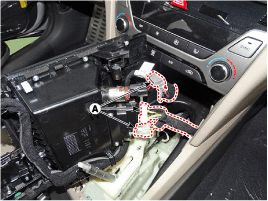
| 9. |
Disconnect the sigajcak connectors (A).
|
| 10. |
Loosen the mounting screws and remove the console front complete assembly (A).
|
| 11. |
To intall, reverse the removal procedure.
|

| [A/T] |
|
|

| 1. |
To remove the gear knob & gear boots (A) pull both of it up.
|
| 2. |
Remove the rubber mat (A).
|
| 3. |
Using a screwdriver or remover, remove the floor console upper cover (A).
|
| 4. |
Disconnect the connectors (A) from the floor console upper cover.
|
| 5. |
Using a screwdriver or remover, remove the console garnish (A).
|
| 6. |
Using a screwdriver or remover, remove the parking brake cover (A).
|
| 7. |
Remove the storage box pad (A).
|
| 8. |
After loosening the mounting screws and bolts, remove the floor console assembly (A).
|
| 9. |
Disconnect the sigajcak connectors (A).
|
| 10. |
Loosen the mounting screws and remove the console front complete assembly (A).
|
| 11. |
To intall, reverse the removal procedure.
|
Rear Console Cover Components and Components Location
| Component Location |

| 1. Rear console cover |
Rear Console Cover Repair procedures
| Replacement |
|
|
| 1. |
Remove the floor console assembly.
(Refer to Floor Console - "Floor Console Assembly") |
| 2. |
Loosen the rear console mounting screws.
|
| 3. |
Using a screwdriver or remover, remove the rear console cover (A).
|
| 4. |
To intall, reverse the removal procedure.
|
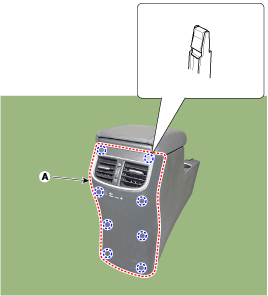
Console Armrest Components and Components Location
| Component Location |
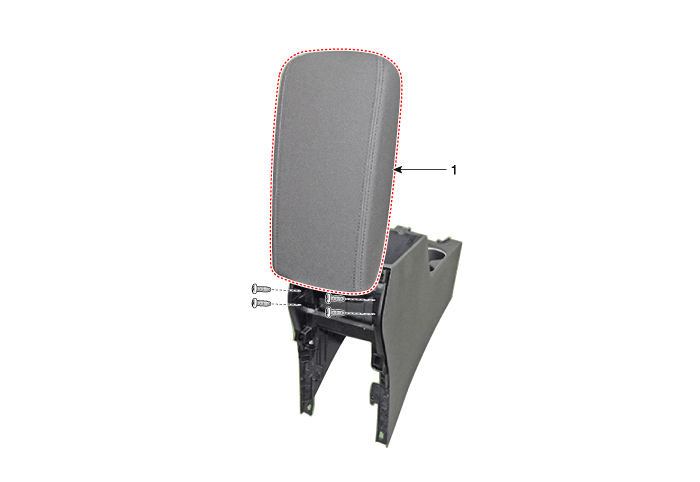
| 1. Console armrest |
Console Armrest Repair procedures
| Replacement |
|
|
| 1. |
Remove the floor console assembly.
(Refer to Floor Console - "Floor Console Assembly") |
| 2. |
Remove the rear console cover.
(Refer to Floor Console - "Rear Console Cover") |
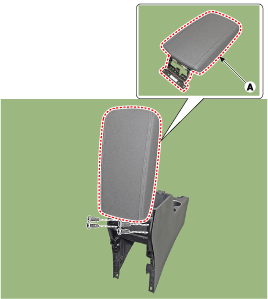
| 3. |
Loosen the mounting screws and remove the console armrest (A).
|
| 4. |
To intall, reverse the removal procedure.
|
Other information:
Hyundai Elantra AD (2016-2020) Owners Manual: Owner Maintenance. Owner Maintenance Schedule
WARNING
Performing maintenance work on a vehicle can be dangerous. If you lack sufficient
knowledge and experience or the proper tools and equipment to do the work, have
it done by an authorized HYUNDAI dealer.
ALWAYS follow these precautions for performing maintenance work:
Park your vehi ...
Hyundai Elantra AD (2016-2020) Owners Manual: Introduction
With the Tire Mobility Kit you stay mobile even after experiencing a tire puncture.
The compressor and sealing compound system effectively and comfortably seals
most punctures in a passenger car tire caused by nails or similar objects and reinflates
the tire.
After you ensure that the tire is ...
