Hyundai Elantra: Floor Console / Floor Console Assembly Repair procedures
Hyundai Elantra AD (2016-2020) Service Manual / Body (Interior and Exterior) / Floor Console / Floor Console Assembly Repair procedures
| Replacement |
| [M/T] |
|

|
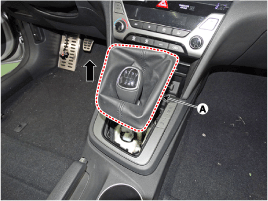
| 1. |
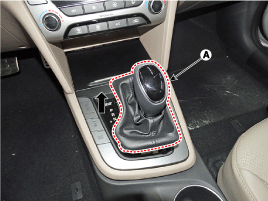
Remove the gear knob & boots (A) pull both of it up.
|
| 2. |
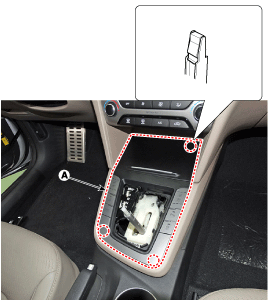
Remove the rubber mat (A).
|
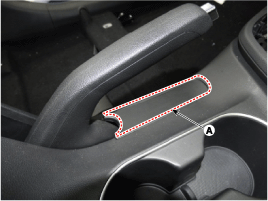
| 3. |
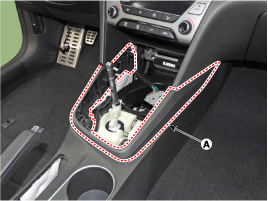
Using a screwdriver or remover, remove the parking brake cover (A).
|
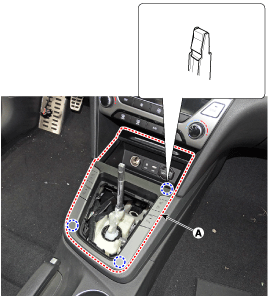
| 4. |
Using a screwdriver or remover, remove the console upper cover (A).
|
| 5. |
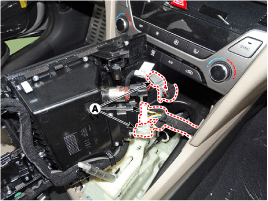
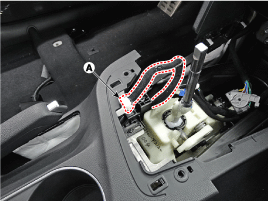
Disconnect the connector (A).
|
| 6. |
Using a screwdriver or remover, remove the console garnish (A).
|
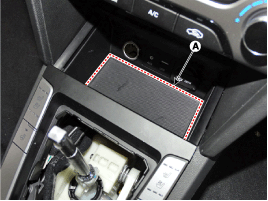
| 7. |
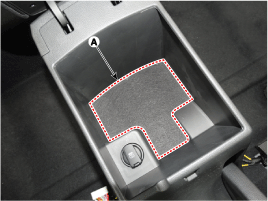
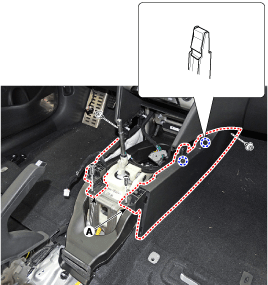
Remove the storage box pad (A).
|
| 8. |
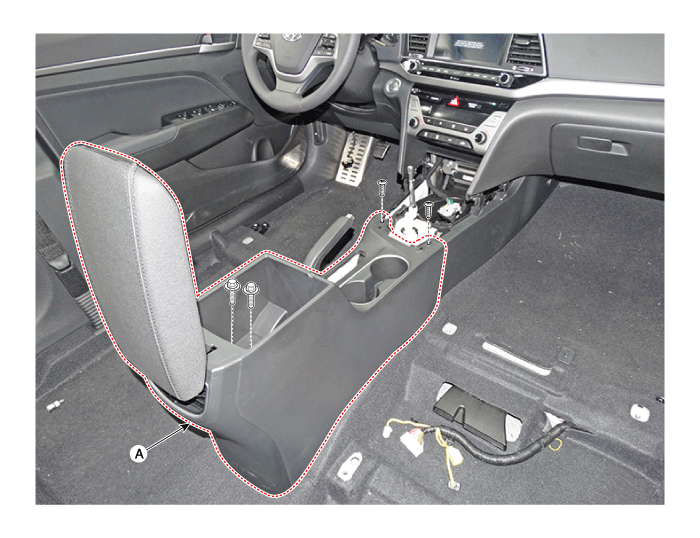
After loosening the mounting screws and bolts, remove the console rear complete assembly (A).
|
| 9. |
Disconnect the sigajcak connectors (A).
|
| 10. |
Loosen the mounting screws and remove the console front complete assembly (A).
|
| 11. |
To intall, reverse the removal procedure.
|

| [A/T] |
|
|

| 1. |
To remove the gear knob & gear boots (A) pull both of it up.
|
| 2. |
Remove the rubber mat (A).
|
| 3. |
Using a screwdriver or remover, remove the floor console upper cover (A).
|
| 4. |
Disconnect the connectors (A) from the floor console upper cover.
|
| 5. |
Using a screwdriver or remover, remove the console garnish (A).
|
| 6. |
Using a screwdriver or remover, remove the parking brake cover (A).
|
| 7. |
Remove the storage box pad (A).
|
| 8. |
After loosening the mounting screws and bolts, remove the floor console assembly (A).
|
| 9. |
Disconnect the sigajcak connectors (A).
|
| 10. |
Loosen the mounting screws and remove the console front complete assembly (A).
|
| 11. |
To intall, reverse the removal procedure.
|
 Floor Console Assembly Components and Components Location
Component Location
1. Floor console assembly
...
 Rear Console Cover Components and Components Location
Component Location
1. Rear console cover
...
Other information:
Hyundai Elantra AD (2016-2020) Owners Manual: Instrument Cluster
■ Conventional cluster
■ Supervision cluster (Type A)
1. Tachometer
2. Speedometer
3. Engine coolant temperature gauge
4. Fuel gauge
5.Warning and indicator lights
6. LCD display (including Trip computer)
The actual cluster in the vehicle may differ from the illustration.
■ Supe ...
Hyundai Elantra AD (2016-2020) Service Manual: Condenser Components and Components Location
Components Location
1. Condenser
...
© 2018-2025 www.helantraad.com
