Hyundai Elantra: Body (Interior and Exterior) / Trunk Lid
Repair procedures
| Adjustment |
| 1. |
Place the car on a flat surface and check whether the body and trunk lid are well-aligned. |
| 2. |
After loosening the trunk lid hinge (A) mounting bolt, adjust the trunk lid by moving it up and down or from side to side. |
| 3. |
Adjust the gap between the trunk lid and body by turning the trunk lid overslam bumpers (B). |
| 4. |
After loosening the trunk lid striker (C) mounting bolts,
adjust the striker by moving it back and forth or from side to side and
then tighten the mounting bolts. |
| 5. |
Make sure the trunk lid opens or closes properly.
|

Trunk Lid Assembly Components and Components Location
| Component Location |
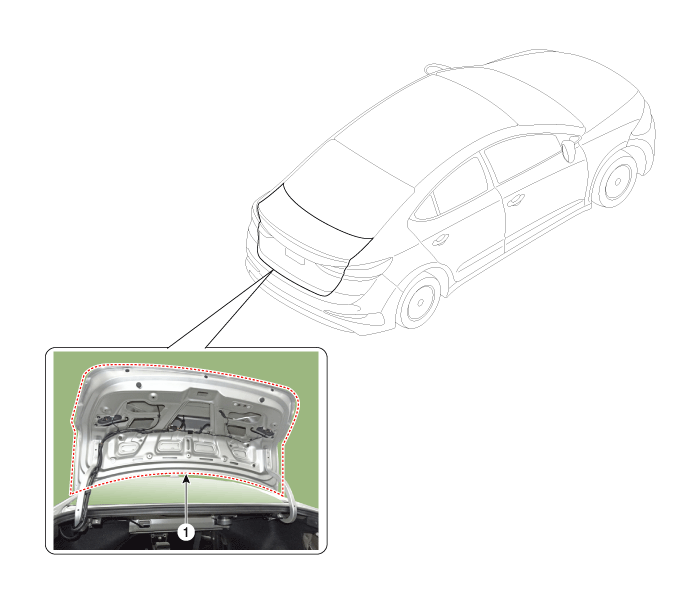
| 1. Trunk lid assembly |
Trunk Lid Assembly Repair procedures
| Replacement |
|

|

| 1. |
Remove the trunk lid trim.
(Refer to Trunk Lid - "Trunk Lid Trim") |
| 2. |
Disconnect the connectors and trunk lid wiring harness (A). |
| 3. |
After loosening the mounting bolts, remove the trunk lid assembly (B).
|
| 4. |
To intall, reverse the removal procedure.
|
Trunk Lid Trim Components and Components Location
| Component Location |
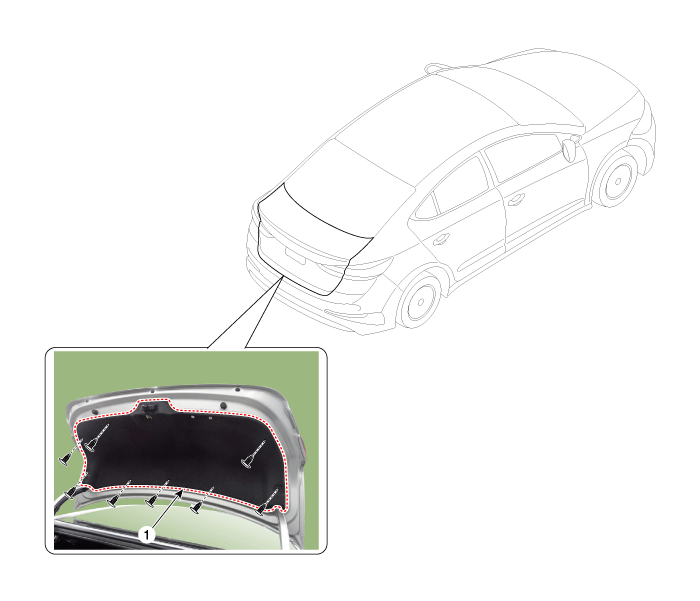
| 1. Trunk lid trim |
Trunk Lid Trim Repair procedures
| Replacement |
|
|

| 1. |
Raise the cover (A) using a auger.
|
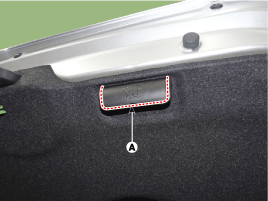
| 2. |
Loosen the mounting screw and remove the trunk handle (A).
|
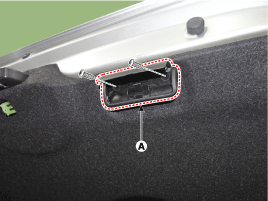
| 3. |
After loosening the mounting screw and clips, then remove the trunk lid trim (A).
|
| 4. |
To intall, reverse the removal procedure.
|
Trunk Lid Latch Repair procedures
| Replacement |
| [Trunk lid latch] |
|
|
| 1. |
Remove the tail trunk lid trim.
(Refer to Trunk Lid - "Trunk Lid Trim") |
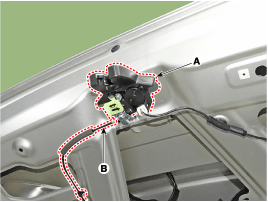
| 2. |
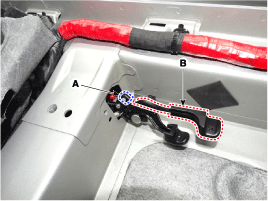
Disconnect the connector (A) and cable (B) and then loosen the bolt and remove the trunk lid latch (C).
|

| 3. |
To install, reverse the removal procedure.
|
| [Trunk lid cable] |
| 1. |
Remove the front seat assembly.
(Refer to Front Seat - "Front Seat Assembly") |
| 2. |
Remove the rear seat assembly.
(Refer to rear Seat - "Rear Seat Assembly") |
| 3. |
Remove the floor console assembly.
(Refer to Floor Console - "Floor Console Assembly") |
| 4. |
Remove the center pillar lower trim.
(Refer to Interior Trim - "Center Pillar Trim") |
| 5. |
Remove the cowl side trim.
(Refer to Interior Trim - "Cowl Side Trim") |
| 6. |
Remove the luggage side trim.
(Refer to Interior Trim - "Cowl Side Trim") |
| 7. |
Remove the floor carpet.
(Refer to "Floor carpet") |
| 8. |
Remove the tail trunk lid trim.
(Refer to Trunk Lid - "Trunk Lid Trim") |
| 9. |
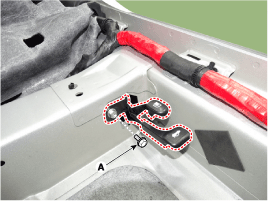
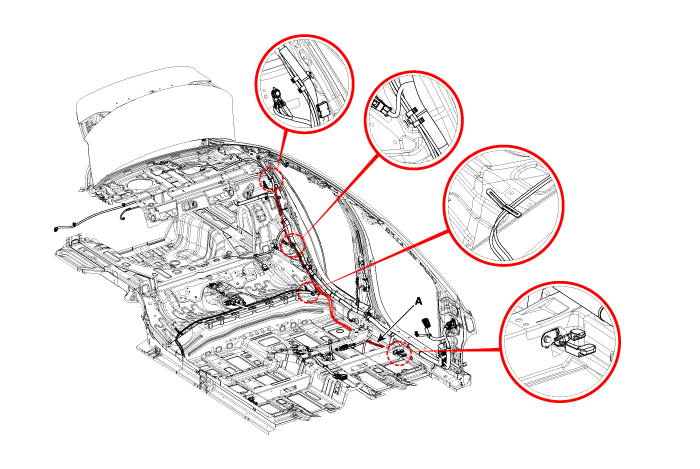
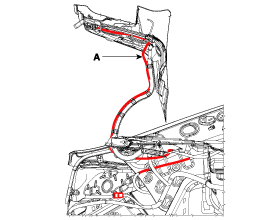
Loosen the trunk lid catch mounting bolt (A).
|
| 10. |
Detach the cable (A) and remove the trunk lid catch (B).
|
| 11. |
Remove the cable (B) from the trunk lid catch (A).
|
| 12. |
Remove the trunk lid cable (A).
|
| 13. |
To install, reverse the removal procedure.
|
| [Trunk lid catch] |
| 1. |
Remove the front seat assembly [LH].
(Refer to Front Seat - "Front Seat Assembly") |
| 2. |
Remove the front door scuff trim [LH].
(Refer to Interior Trim - "Front Door Scuff Trim") |
| 3. |
Remove the cowl side trim [LH].
(Refer to Interior Trim - "Cowl Side Trim") |
| 4. |
Remove the floor console assembly.
(Refer to Floor Console - "Floor Console Assembly") |
| 5. |
Separate the floor carpet to obtain space for removing the rear heating duct. |
| 6. |
Loosen the trunk lid catch mounting bolt (A).
|
| 7. |
Detach the cable (A) and remove the trunk lid catch (B).
|
| 8. |
To install, reverse the removal procedure.
|
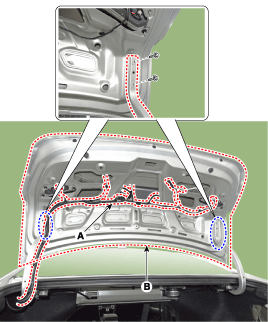
Trunk Lid Weatherstrip Repair procedures
| Replacement |
| 1. |
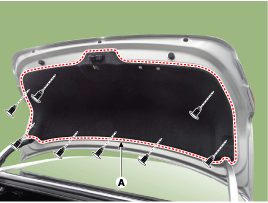
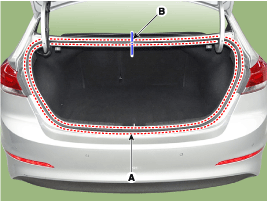
Remove the trunk lid weatherstrip (A).
|
| 2. |
To intall, reverse the removal procedure.
|
Other information:
Hyundai Elantra AD (2016-2020) Service Manual: Rear Body Body Repair
* These dimensions indicated in this figure are actual-measurement dimensions. [ Unit : mm (inch) ]
Side outer panel rear cornerSide outer panel rear cornerSide outer panel rear cornerRear combination lamp mounting hole (O8)Rear bumper mounting hole (8.5X8.5)Rear bumper mounting hole (14X16 ...
Hyundai Elantra AD (2016-2020) Owners Manual: Electric chromic mirror (ECM) with HomeLinkÂź system and Blue LinkÂź
Your vehicle may be equipped with a Gentex Automatic-Dimming Mirror and an Integrated
HomeLinkÂź Wireless Control System. During nighttime driving, this feature will automatically
detect and reduce rearview mirror glare. The HomeLinkÂź Universal Transceiver allows
you to activate your garage d ...
