Hyundai Elantra: Automatic Transaxle Control System / Shift Cable Repair procedures
| Removal |
| 1. |
Air cleaner assembly and air duct.
(Refer to Engine Mechanical System - "Air cleaner") |
| 2. |
Battery and battery tray.
(Refer to Engine Electrical System - "Battery") |
| 3. |
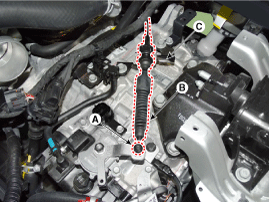
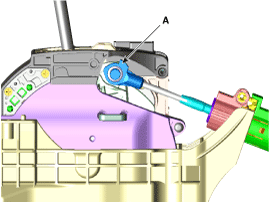
Remove the nut (A) from the manual control lever. |
| 4. |
Remove the shift cable (B) from the bracket (C) at transaxle side.
|
| 5. |
Remove the floor console assembly.
(Refer to Body - "Floor Consol") |
| 6. |
Disconnect the shift cable.
|
| 7. |
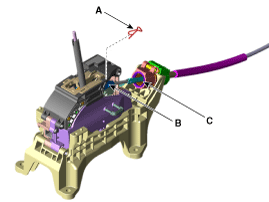
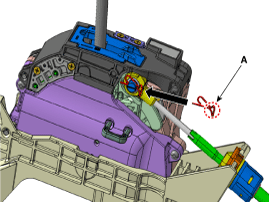
Disconnect the shift cable retainer (A) after removing the nuts. |
| 8. |
Remove the shift cable by pulling it toward the interior.
|
| Installation |
| 1. |
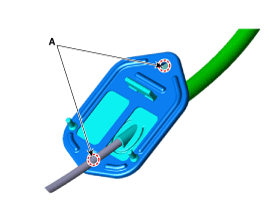
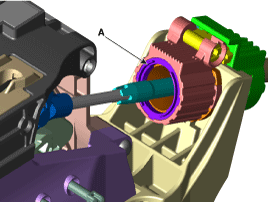
Install the shift cable retainer (A).
|

| 2. |
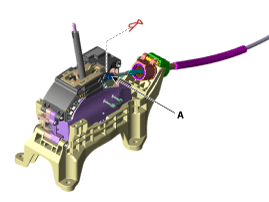
Install the shift cable (A) in the shifter lever.
|

| 3. |
Install the shift cable (B) in the cable bracket (C). |
| 4. |
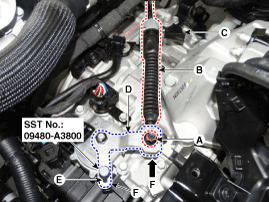
Align the hole (E) in the manual control lever with the "N"
position hole (F) of the inhibitor switch and then insert the inhibitor
switch guide pin (SST No: 09480-A3800). |
| 5. |
Lightly tighten the nut (A) after connected the shift cable (B) in the manual control lever (D). |
| 6. |
Push shift cable (B) lightly to "F" direction shown to eliminate free play of shift cable. |
| 7. |
Tighten the nut (A) to the specified torque.
|
| 8. |
Remove the inhibitor switch guide pin (SST No.: 09480-A3800) from the hole. |
| 9. |
Install the airbag module.
(Refer to Restraint - "Airbag Module") |
| 10. |
Install the floor console assembly.
(Refer to Body - "Floor Consol") |
| 11. |
Install the air cleaner assembly.
(Refer to Engine Mechanical System - "Air cleaner") |
| 12. |
Install the battery and battery tray.
(Refer to Engine Electrical System - "Battery") |
| 13. |
Install the air duct.
(Refer to Engine Mechanical System - "Air cleaner") |
| 14. |
Check that operating surely at each range of the inhibitor switch corresponding to each position of shift lever. |
 Shift Cable Components and Components Location
Components Location
1. Shift lever knob & boots2. Shift lever assembly3. Shift cable4. Manual control lever5. shift cable retainer6. Snap pin
...

Other information:
Hyundai Elantra AD (2016-2020) Service Manual: Instrument Cluster Components and Components Location
Components
[General Standard Type (3.5" OLED)]
[MONO Type (3.5")]
[General Super Vision Type (4.2" LCD)]
Connector Pin Information
NoDescriptionNoDescription1GND21Trip switch (-)2Illumination (-)22Trip switch 1 (+)3Rheostat switch (Down)_Input23Trip switch 2 (+)4Rheostat switch (Up)_Input24-5 ...
Hyundai Elantra AD (2016-2020) Service Manual: Special Service Tools
Special Service Tools
Tool (Number and Name)IllustrationUse09546-26000Strut spring compressorCompression of coli spring09568-1S100Saperate the ball joint from the front alxe09546-3X100 Shock absorber lock nut removal toolUsed for remove the shock absorber lock nut.
...
