Hyundai Elantra: ABS(Anti-Lock Brake System) / Rear Wheel Speed Sensor Repair procedures
Hyundai Elantra AD (2016-2020) Service Manual / Brake System / ABS(Anti-Lock Brake System) / Rear Wheel Speed Sensor Repair procedures
| Removal |
| 1. |
Loosen the wheel nuts slightly.
Raise the vehicle, and make sure it is securely supported. |
| 2. |
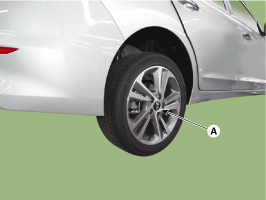
Remove the rear wheel and tire (A) from front hub .
|
| 3. |
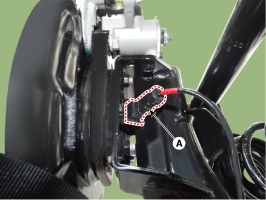
Disconnect the rear wheel speed sensor connector(A).
|
| 4. |
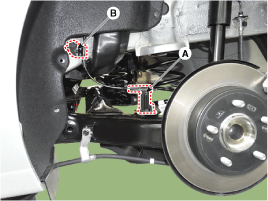
Loosen the mounting bolt and then remove the wheel speed sensor cable bracket (A) and (B).
|
| 5. |
Remove the rear seat back.
(Refer to Body - "Seat") |
| 6. |
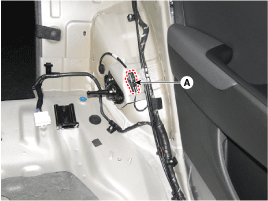
Disconnect the rear wheel speed sensor connector (A), and than remove the rear wheel speed sensor.
|
| 7. |
To install, reverse the removal procedure. |
| Inspection |
| 1. |
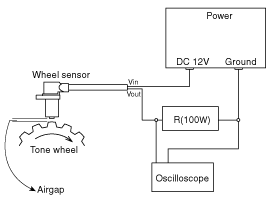
Measure the output voltage between the terminal of the wheel speed sensor and the body ground.
|
| 2. |
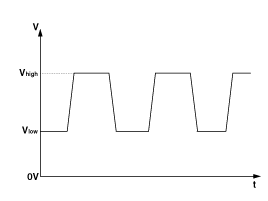
Compare the change of the output voltage of the wheel speed sensor to the normal change of the output voltage as shown below.
|
 Rear Wheel Speed Sensor Components and Components Location
Components
1. Front wheel speed sensor2. Front wheel speed sensor cable
...
Other information:
Hyundai Elantra AD (2016-2020) Service Manual: Rear Pillar Trim Components and Components Location
Component Location
1. Rear pillar trim
...
Hyundai Elantra AD (2016-2020) Service Manual: Description and Operation
Description
This specification applies to HCU(Hydraulic Control Unit) and
ECU(Electronic Control Unit) of the HECU.(Hydraulic and Electronic
Control Unit)
This specification is for the wiring design and installation of ABS ECU.
This unit has the functions as follows.
-
Input of signal fr ...
© 2018-2026 www.helantraad.com

