Hyundai Elantra: Automatic Transaxle Control System / Output Speed Sensor Repair procedures
| Inspection |
| 1. |
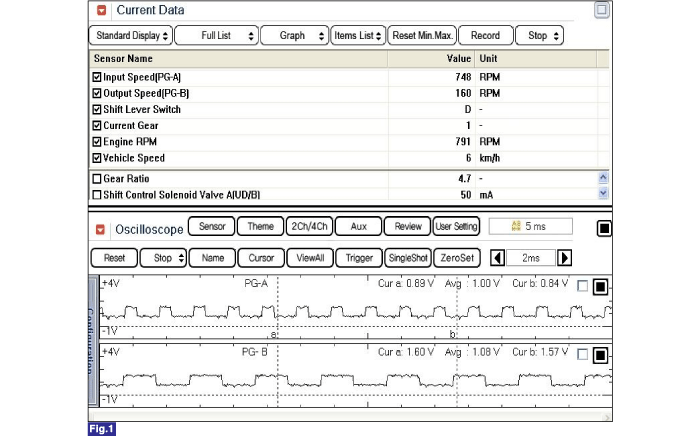
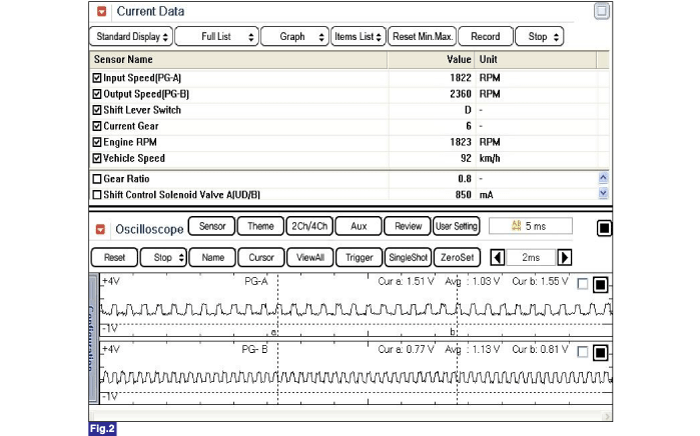
Using the GDS, check the input/output speed sensor waveforms.
Fig 1) Input/Output speed sensor at low speed
Fig 2) Input/Output speed sensor at high speed
|
| Removal |
| 1. |
Remove the air cleaner assembly and air duct.
(Refer to Engine Mechanical System - "Air cleaner") |
| 2. |
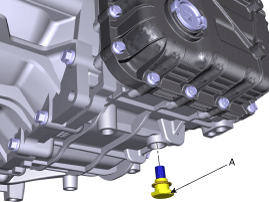
Remove the drain plug (A) and drain the ATF totally and then reinstall the drain plug.
|
| 3. |
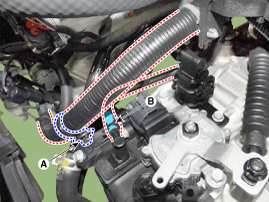
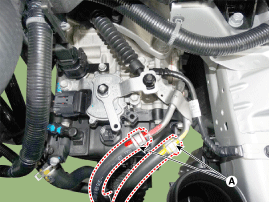
Remove the wiring mounting clip (A). |
| 4. |
Disconnect the air breather hose (B) from the valve body cover.
|
| 5. |
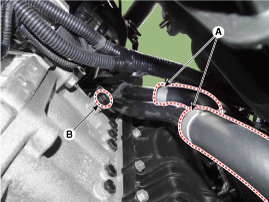
Disconnect the hose (A) after removing the automatic transaxle fluid cooler hose clamp.
|
| 6. |
Disconnect the ATF warmer hose (A). |
| 7. |
Remove the mounting bolt of the heater pipe.
|
| 8. |
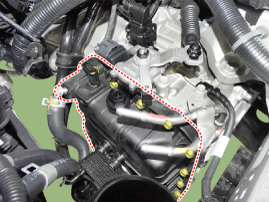
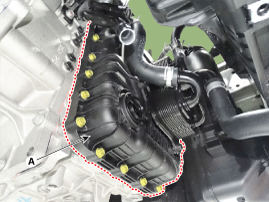
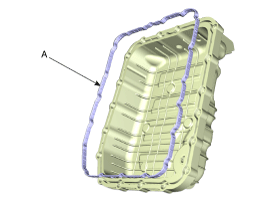
Remove the valve body cover (A).
|
| 9. |
Disconnect the oil temperature sensor and solenoid valve connector (A) from the valve body.
|
| 10. |
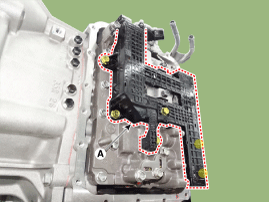
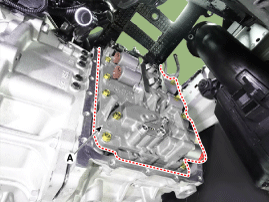
Remove the valve body assembly (A).
|
| 11. |
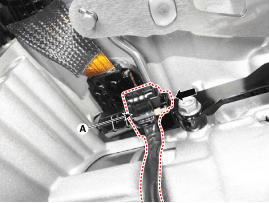
Disconnect the input & output speed sensor connector (A).
|
| 12. |
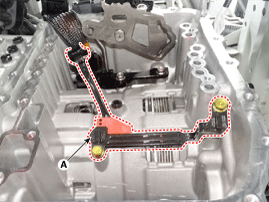
Remove the input & output speed sensor (A) after removing the bolts(2ea).
|
| Installation |
| 1. |
To install, reverse the removal procedure. |
| 2. |
Check fluid level after filling the automatic transaxle with fluid.
(Refer to Hydraulic System - "Fluid") |
 Output Speed Sensor Schematic Diagrams
Circuit Diagram
...
 Torque Converter Control Solenoid Valve (T/CON_VFS) Description and Operation
Description
•
Torque converter control solenoid valve (T/CON_VFS) is attached to the valve body.
•
This variable force solenoid valve indirectly controls the hydraulic pressure inside ...
Other information:
Hyundai Elantra AD (2016-2020) Owners Manual: Rocking the Vehicle
If it is necessary to rock the vehicle to free it from snow, sand, or mud, first
turn the steering wheel right and left to clear the area around your front wheels.
Then, shift back and forth between R (Reverse) and a forward gear.
Try to avoid spinning the wheels, and do not race the engine.
T ...
Hyundai Elantra AD (2016-2020) Service Manual: AUX jack Description and Operation
Description
The multimedia jack on the console upper cover is for
customers who like to listen to external portable music players like the
MP3 etc., through the vehicle's sound system when it is linked to this
jack. The customer has this added option.
In case of distortions from media conn ...

