Hyundai Elantra: Front Suspension System / Front Strut Assembly Repair procedures
| Removal |
| 1. |
Loosen the wheel nuts slightly.
Raise the vehicle, and make sure it is securely supported. |
| 2. |
Remove the front wheel and tire (A) from front hub.
|


| 3. |
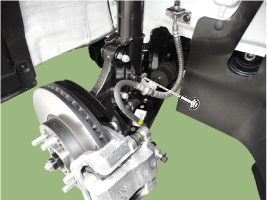
Loosen the mounting holt and then remove the brake hose from the strut assembly.
|
| 4. |
Loosen the mounting holt and then remove the wheel speed sensor cable from the strut assembly.
|
| 5. |
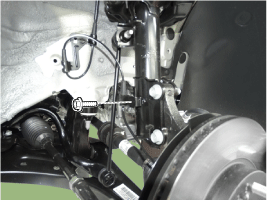
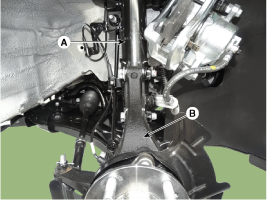
Disconnect the stabilizer link with the front strut assembly after loosening the nut (A).
|
| 6. |
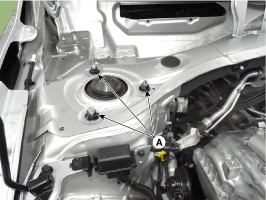
Remove the cowl top cover (A).
(Refer to Body - "Cowl Top Cover") |
| 7. |
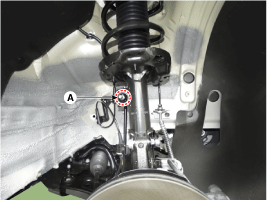
Loosen the upper strut mounting nut (A).
|
| 8. |
Disconnect the front strut assembly (A) with the front axle (B) by loosening the bolts & nuts.
|
| 9. |
To install, reverse the removal procedure. |
| Disassembly |
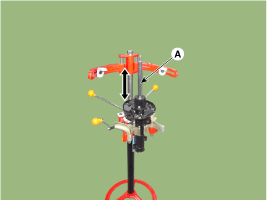
| 1. |
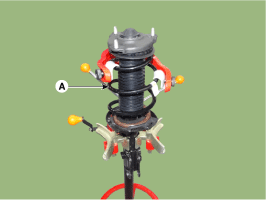
Using the special tool (09546-26000), compress the coil spring (A).
|
| 2. |
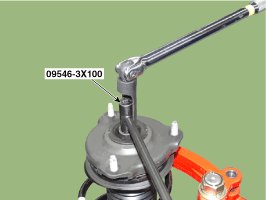
Using the special tool (09546-3X100), remove the self locking nut.
|
| 3. |
Remove the insulator, strut bearing, coil spring and dust cover from the strut assembly.
|
| Inspection |
| 1. |
Check the strut bearing for wear and damage. |
| 2. |
Check the spring upper and lower pad for damage and deterioration. |
| 3. |
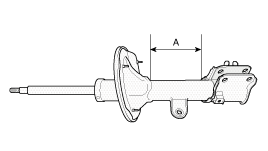
Compress and extend the piston rod (A) and check that there is no abnormal resistance or unusual sound during operation.
|
| Disposal |
| 1. |
Fully extend the piston rod. |
| 2. |
Drill a hole on the (A) section to remove gas from the cylinder.
|

| Reassembly |
| 1. |
To install, reverse the removal procedure. |
| 2. |
Compress and extend the piston rod (A) and check that there is no abnormal resistance or unusual sound during operation.
|
| 3. |
Using the special tool (09546-3X100), install the self locking nut.
|
 Front Strut Assembly Components and Components Location
Components
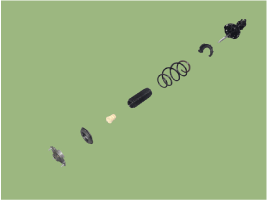
1. Strut assembly2. Lock nut3. Insulator 4. Strut bearing & Spring upper pad5. Bumper rubber6. Dust cover7. Coli spring8. Spring lower pad
...
 Front Lower Arm Repair procedures
Removal
1.
Loosen the wheel nuts slightly.
Raise the vehicle, and make sure it is securely supported.
2.
Remove the front wheel and tire (A) from front hub.
Tightening torque :
107.9 ~ 12 ...
Other information:
Hyundai Elantra AD (2016-2020) Service Manual: Airbag Module Disposal Description and Operation
Airbag Disposal
When you scrap a vehicle equipped with an airbag, you must deploy it first.
When you deploy an airbag, you need to have a skilled
mechanic do the work. The used airbag should not be reinstalled in
another vehicle for reuse.
•
Upon deployment, the ...
Hyundai Elantra AD (2016-2020) Service Manual: Rain Sensor Repair procedures
Removal
•
The dust or foreign substance on the rain sensor have a bad
effect upon the rain sensor capability,so protect the sensor surface
with protection cover until installing the rain sensor to bracket for
accurate funtion.
•
The coupling pad on the rai ...
