Hyundai Elantra: Front Seat / Front Seat Assembly Repair procedures
Hyundai Elantra AD (2016-2020) Service Manual / Body (Interior and Exterior) / Front Seat / Front Seat Assembly Repair procedures
| Replacement |
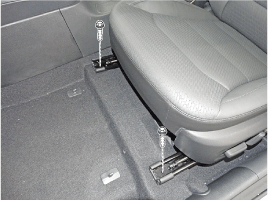
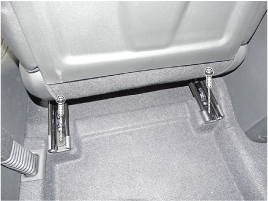
| 1. |
Open the cover and loosen the front seat mounting bolts.
[Front]
[Rear]
|
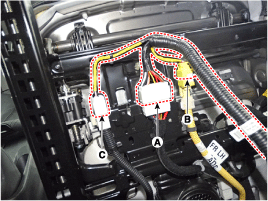
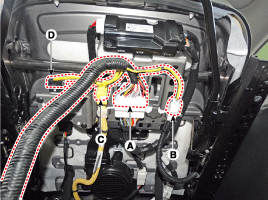
| 2. |
Disconnect the main connector (A), front seat belt buckle connector (B), airbag connector (C), seat belt reminder connector (D).
[Driver's]
[Passenger's]
|
| 3. |
To intall, reverse the removal procedure.
|

 Front Seat Assembly Components and Components Location
Component Location
1. Front seat assembly
...
 Front Seat Shield Outer Cover Components and Components Location
Component Location
1. Front seat shield outer cover
...
Other information:
Hyundai Elantra AD (2016-2020) Service Manual: Drive plate Components and Components Location
Components
1. Adapter plate2. Drive plate
...
Hyundai Elantra AD (2016-2020) Service Manual: Auto Defoging Actuator Specifications
Specifications
Door positionVoltage (V)Error detectingMax. cooling0.3 ± 0.15Low voltage : 0.1V or lessMax. heating4.7 ± 0.15High voltage : 4.9V or more
...
© 2018-2026 www.helantraad.com
