Hyundai Elantra: Forward Collision Avoidance (FCA) System / FCA Sensor

In order for the FCA system to operate properly, always make sure the camera is clean and free of dirt, snow, and debris.
Dirt, snow, or foreign substances on the sensor cover or sensor may adversely affect the sensing performance of the sensor.
NOTICE
- NEVER install any accessories or stickers on the front windshield, or tint the front windshield.
- NEVER place any reflective objects (i.e. white paper, mirror) over the crash pad. Any light reflection may prevent the system from functioning properly.
- Pay extreme caution to keep the camera dry.
- NEVER disassemble the camera assembly, or apply any impact on the camera assembly.
- If the sensor is forcibly moved out of proper alignment, the FCA system may not operate correctly. In this case, a warning message may not be displayed. Have the vehicle inspected by an authorized HYUNDAI dealer.
Information
Have the system checked by an authorized HYUNDAI dealer when:
- The windshield glass is replaced.
Warning message and warning light
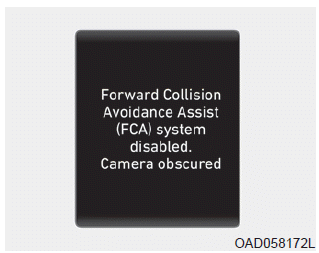
Forward Collision Avoidance Assist (FCA) system disabled. Camera obscured
When the front camera is blocked with dirt, snow, or debris, the FCA system operation not be able to detect other vehicles. If this occurs, a warning message will appear on the LCD display. The system will operate normally when such dirt, snow or debris is removed.
FCA may not properly operate in an area (e.g. open terrain) where any objects or vehicles are not detected after turning on the engine.
 FCA Warning Message and Brake Control
FCA produces warning messages, warning alarms, and emergency braking based on
the level of risk of a frontal collision, such as when a vehicle ahead suddenly
brakes.
Collision Warning (First warn ...
 System Malfunction
Check Forward Collision Avoidance Assist system
When FCA is not working properly, the FCA warning light ()
will illuminate and the warning message will appear for a few seconds. After
the ...
Other information:
Hyundai Elantra AD (2016-2020) Service Manual: Crash Pad Lower Panel Repair procedures
Replacement
•
Put on gloves to prevent hand injuries.
•
When removing with a flat-tip screwdriver or remover, wrap protective tape around the tools to prevent damage to components.
•
Use a plastic panel removal tool to remove int ...
Hyundai Elantra AD (2016-2020) Service Manual: Components and Components Location
Component Location
1. DDM (Driver Door Module)2. ADM (Assistant Door Module)3. RRDM / RLDM (Rear Door Module)4. Front window motor5. Rear window motor
...
