Hyundai Elantra: Maintenance / Air Cleaner
Filter Replacement
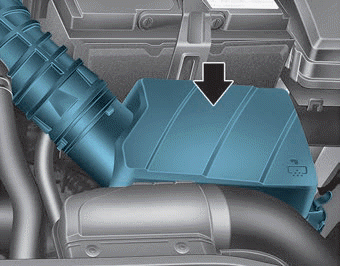
â– 1.6 T-GDI
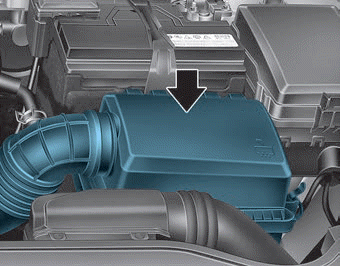
â– 2.0 MPI
The air cleaner filter can be cleaned for inspection using compressed air.
Do not attempt to wash or to rinse it, as water will damage the filter.
If soiled, the air cleaner filter must be replaced.

1. Loosen the air cleaner cover attaching clips and open the cover.
2. Wipe the inside of the air cleaner.

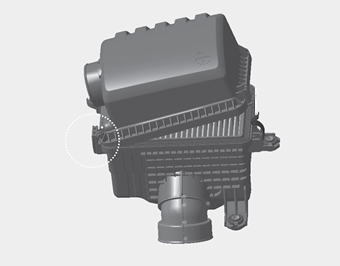
3. Replace the air cleaner filter.
4. Insert the air cleaner cover in the hinge and engage the clamp after closing the cover.
5. Check that the cover is firmly installed.
Information
If the vehicle is operated in extremely dusty or sandy areas, replace the element more often than the usual recommended intervals (refer to "Maintenance Under Severe Usage Conditions" in this chapter).
NOTICE
- Do not drive with the air cleaner filter removed. This will result in excessive engine wear.
- When removing the air cleaner filter, be careful that dust or dirt does not enter the air intake, or damage may result.
- Use HYUNDAI genuine parts, use of non-genuine parts could damage the air flow sensor.
 Parking Brake
Checking the Parking Brake
Check the stroke of the parking brake by counting the number of "clicks" heard
while fully applying it from the released position. Also, the parking brake alo ...
 Climate Control Air Filter
Filter Inspection
The climate control air filter should be replaced according to the Maintenance
Schedule. If the vehicle is operated in severely air-polluted cities or on dusty
rough roads for a ...
Other information:
Hyundai Elantra AD (2016-2020) Service Manual: Main Crash Pad Assembly Components and Components Location
Components
1. Main crash pad assembly 2. Side defroster nozzle assembly [LH]3. Side defroster nozzle assembly [RH]4. Defroster center nozzle assembly5. Side defroster hose assembly [LH]6. Side defroster hose assembly [RH]7. Defroster nozzle assembly8. Heater connection duct connector assembl ...
Hyundai Elantra AD (2016-2020) Service Manual: Canister Repair procedures
Removal
1.
Turn the ignition switch OFF and disconnect the battery negative (-) cable.
2.
Lift the vehicle.
3.
Disconnect the ventilation hose (A), and canister close valve extension connector (B).
4.
Disconnect the vapor tube quick-connector (A).
5.
Remove installation nuts ...
