Hyundai Elantra: Timing System / Timing Chain Cover Repair procedures
| Removal |
|

|

| 1. |
Disconnect the battery negative terminal. |
| 2. |
Remove the RH front wheel.
(Refer to Suspension System - "Wheel") |
| 3. |
Remove the engine room under cover.
(Refer to Engine And Transaxle Assembly - "Engine Room Under Cover") |
| 4. |
Remove the engine cover.
(Refer to Engine And Transaxle Assembly - "Engine Cover") |
| 5. |
Remove the cylinder head cover.
(Refer to Cylinder Head Assembly ŌĆō ŌĆ£Cylinder Head CoverŌĆØ) |
| 6. |
Drain engine oil and remove the oil pan.
(Refer to Lubrication System ŌĆō ŌĆ£Oil PanŌĆØ)
(Refer to Lubrication System - "Engine Oil") |
| 7. |
Remove the engine mounting support bracket.
(Refer to Engine And Transaxle Assembly - "Engine Mounting") |
| 8. |
Remove the crankshaft damper pulley.
(Refer to Timing System ŌĆō ŌĆ£Crankshaft Damper Pulley") |
| 9. |
Remove the water pump pulley.
(Refer to Cooling System - "Water pump") |
| 10. |
Remove the idler.
(Refer to Timing System - "Idler") |
| 11. |
Remove the alternator.
(Refer to Engine Electrical System ŌĆō ŌĆ£AlternatorŌĆØ) |
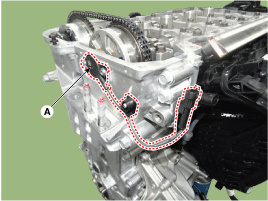
| 12. |
Remove the front engine hanger (A).
|
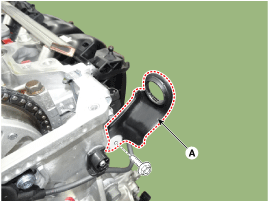
| 13. |
Remove the intermediate lock CVVT actuator (A).
|
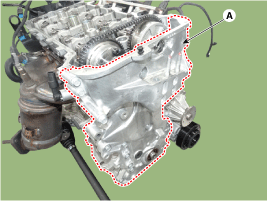
| 14. |
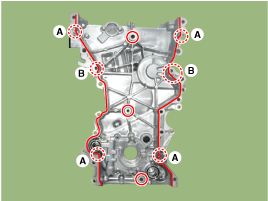
Remove the timing chain cover (A) by gently prying the gaps between the cylinder head and cylinder block.
|
| Installation |
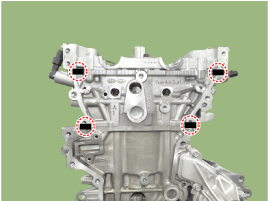
| 1. |
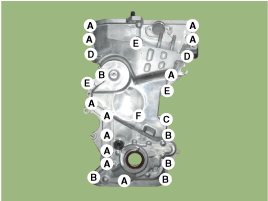
Install the timing chain cover.
|
| 2. |
Replace the front oil seal if necessary.
(Refer to Timing System - ŌĆ£Front Oil SealŌĆØ) |
| 3. |
Install the intermediate lock CVVT actuator (A).
|
| 4. |
Install the front engine hanger (A).
|
| 5. |
Install the other parts reverse order of removal. |
| 6. |
Add all the necessary fluids and check for leaks. Connect GDS. Check for codes, note, and clear. Recheck.
|
 Timing Chain Cover Components and Components Location
Components
1. Timing chain cover2. Service plug bolt & gasket
...
 Timing Chain Components and Components Location
Components
1. Intake camshaft2. Exhaust camshaft3. Intake CVVT assembly4. Exhaust CVVT assembly5. Timing chain6. Timing chain tensioner arm7. Timing chain tensioner8. Timing chain guide
...
Other information:
Hyundai Elantra AD (2016-2020) Service Manual: Crankshaft Position Sensor (CKPS) Description and Operation
Description
Crankshaft Position Sensor (CKPS) detects the crankshaft
position and is one of the most important sensors of the engine control
system. If there is no CKPS signal input, the engine may stop because of
CKPS signal missing. This sensor is installed on the cylinder block or
the ...
Hyundai Elantra AD (2016-2020) Service Manual: Cowl Side Trim Repair procedures
Replacement
ŌĆó
Put on gloves to prevent hand injuries.
ŌĆó
When removing with a flat-tip screwdriver or remover, wrap protective tape around the tools to prevent damage to components.
ŌĆó
When removing the interior trim pieces, use a ...
