Hyundai Elantra: Automatic Transaxle Control System / SS-A Solenoid Valve(ON/OFF) Repair procedures
| Inspection |
| 1. |
Turn ignition switch OFF. |
| 2. |
Remove the battery and battery tray.
(Refer to Engine Electrical System - "Battery") |
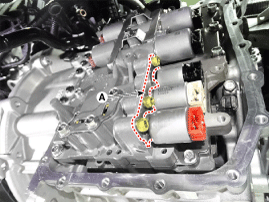
| 3. |
Disconnect the solenoid valve connector (A).
|

| 4. |
Measure resistance between sensor signal terminal and sensor ground terminal. |
| 5. |
Check that the resistance is within the specification. |
| Removal |
| 1. |
Remove the air cleaner assembly and air duct.
(Refer to Engine Mechanical System - "Air cleaner") |
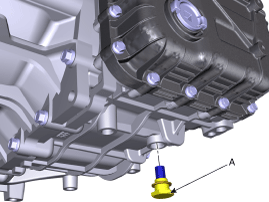
| 2. |
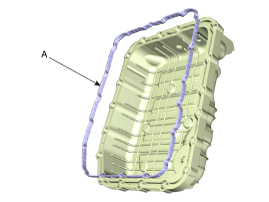
Remove the drain plug (A) and drain the ATF totally and then reinstall the drain plug.
|

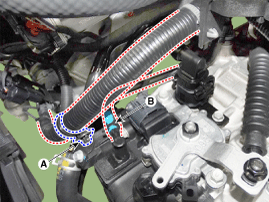
| 3. |
Remove the wiring mounting clip (A). |
| 4. |
Disconnect the air breather hose (B) from the valve body cover.
|
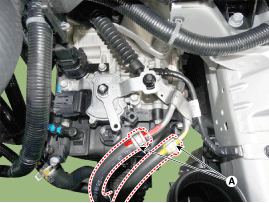
| 5. |
Disconnect the hose (A) after removing the automatic transaxle fluid cooler hose clamp.
|
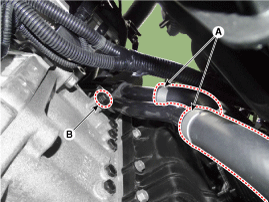
| 6. |
Disconnect the ATF warmer hose (A). |
| 7. |
Remove the mounting bolt of the heater pipe.
|
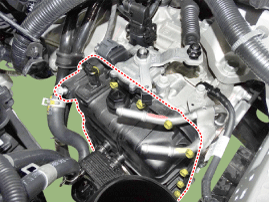
| 8. |
Remove the valve body cover (A).
|
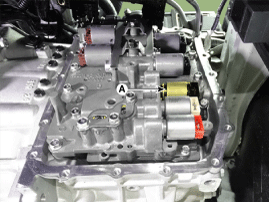
| 9. |
Disconnect the oil temperature sensor and solenoid valve connector (A) from the valve body.
|
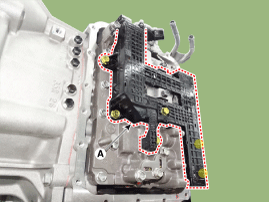
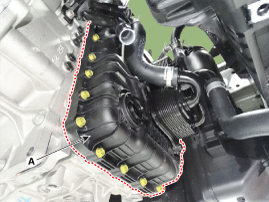
| 10. |
Remove the valve body assembly (A).
|
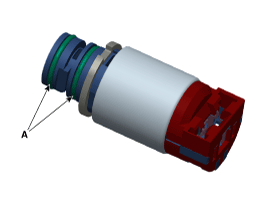
| 11. |
Remove the ON/OFF solenoid valve (A).
|
| Installation |
| 1. |
To install, reverse the removal procedure. |
| 2. |
Check fluid level, after filling the automatic transaxle with fluid.
(Refer to Hydraulic System - "Fluid") |
| 3. |
Perform the TCM adaptive values learning procedure.
(Refer to Automatic Transaxle Control System - "Repair procedures") |
 SS-A Solenoid Valve(ON/OFF) Schematic Diagrams
Circuit Diagram
...
 Inhibitor Switch Description and Operation
Description
•
The inhibitor switch mounted on the upper of transaxle and connected with shifter lever.
•
The inhibitor switch has four points of contact and it makes the signals(S1, S ...
Other information:
Hyundai Elantra AD (2016-2020) Service Manual: TPMS Sensor Description and Operation
Description
1.
General description
WU is a sensor placed in the tire that reports pressure and temperature.
The WU is mounted inside the wheels, fixed to the valve. The angle between the valve and the housing of the WU is variable.
This allows adaptation to various types of rims.
The Wheel ...
Hyundai Elantra AD (2016-2020) Service Manual: Cooling Fan Repair procedures
Removal and Installation
Cooling fan assembly
1.
Disconnect the battery negative terminal.
2.
Remove the air duct and air cleaner assembly.
(Refer to Intake and Exhaust System - "Air Cleaner")
3.
Disconnect the over flow hose (A).
4.
Remove the filler neck assembly (A).
Tighteni ...
