Hyundai Elantra: Suspension System / Rear Suspension System
Hyundai Elantra AD (2016-2020) Service Manual / Suspension System / Rear Suspension System
Components and Components Location
| Components Location |
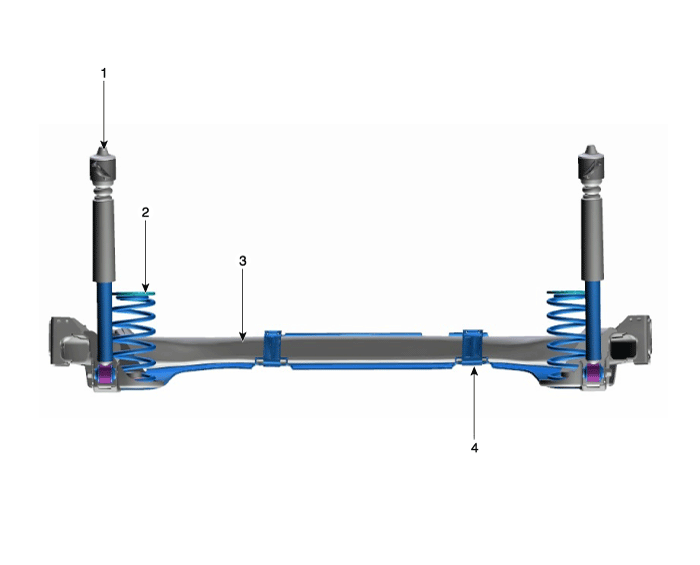
| 1. Rear shock absorber 2. Coil spring | 3. Torsion beam axle 4. Torsion beam axle cover |
Rear Shock Absorber Components and Components Location
| Components |
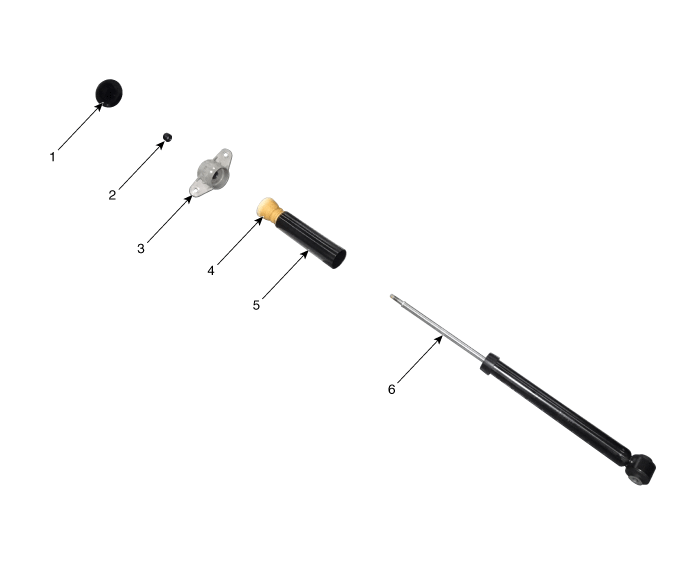
| 1. Shock absorber dust cap 2. Lock nut 3.Insulator assembly | 4. Bumper rubber 5. Dust cover 6. Shock absorber |
Rear Shock Absorber Repair procedures
| Removal |
| 1. |
Loosen the wheel nuts slightly. |
| 2. |
Raise the vehicle, and make sure it is securely supported. |
| 3. |
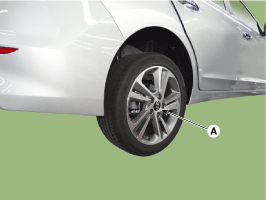
Remove the rear wheel and tire (A) from front hub.
|

| 4. |
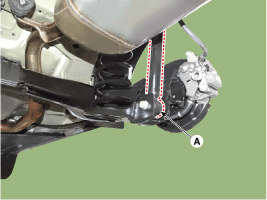
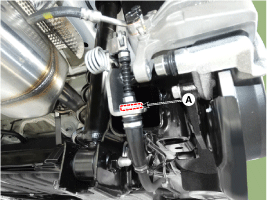
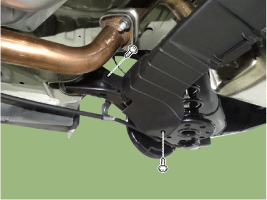
Remove the rear shock absorber (A) from the frame by loosening the bolt.
|

| 5. |
Loosen the bolt & nut and then remove the rear shock absorber (A) from the torsion beam axle.
|
| 6. |
To install, reverse the removal procedure. |
| Disassembly |
| 1. |
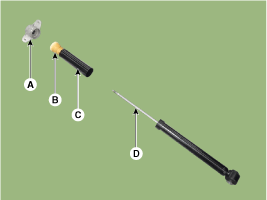
Remove the lock nut cover (A).
|

| 2. |
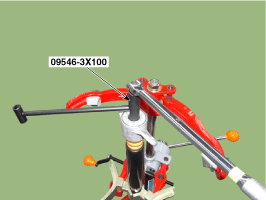
Using the special tool (09546-3X100), install the self locking nut.
|
| 3. |
Separate the bracket assembly (A), bumper rubber (B), dust cover (C), shock absorber (D).
|
| Disposal |
| 1. |
Remove the strike cap (A) from the shock absorber assembly. |
| 2. |
Remove the gas by Drilling a hole in the inner oil seal.
|

| Reassembly |
| 1. |
To reassembly, reverse the disassembly procedure. |
| 2. |
Using SST (09546-3X100), install the lock nut.
|
| 3. |
Install the lock nut cover (A).
|
Rear Coil Spring Components and Components Location
| Components |

| 1. Spring upper pad 2. Coil spring | 3. Spring upper pad |
Rear Coil Spring Repair procedures
| Removal |
| 1. |
Loosen the wheel nuts slightly. |
| 2. |
Raise the vehicle, and make sure it is securely supported. |
| 3. |
Remove the rear wheel and tire (A) from front hub.
|
| 4. |
Remove the parking brake cable fixed clip (A).
|
| 5. |
Pull the spanner as a below arrow in order to loosen the cable and then remove the parking cable (A).
|
| 6. |
Loosen the bolt & nut and then remove the rear shock absorber (A) from the torsion beam axle.
|
| 7. |
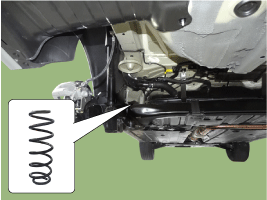
Remove the coil spring.
|
| 8. |
To install, reverse the removal procedure. |
Rear Torsion Beam Axle Components and Components Location
| Components (1) |
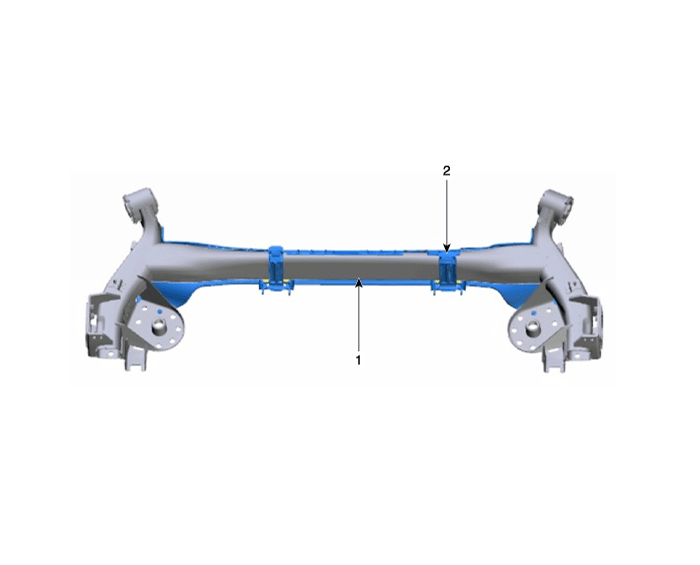
| 1. Torsion beam axle | 2. Torsion beam axle cover |
Rear Torsion Beam Axle Repair procedures
| Removal |
| [Disc type] |
| 1. |
Loosen the wheel nuts slightly. |
| 2. |
Raise the vehicle, and make sure it is securely supported. |
| 3. |
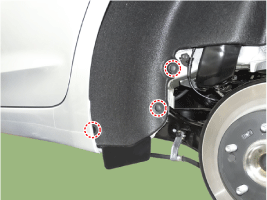
Remove the rear wheel and tire (A) from front hub.
|
| 4. |
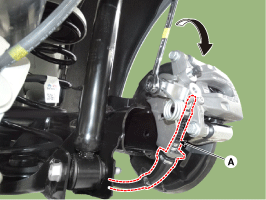
Remove the brake caliper from the torsion beam axle.
(Refer to Brake System - "Rear Disc Brake") |
| 5. |
Remove the rear hub assembly.
(Refer to Dirveshaft and axle - "Rear Axle assembly") |
| 6. |
Loosen the bolt & nut and then remove the rear shock absorber (A) from the torsion beam axle.
|
| 7. |
Remove the coil spring.
|
| 8. |
Remove the rear torsion beam axle cover.
|
| 9. |
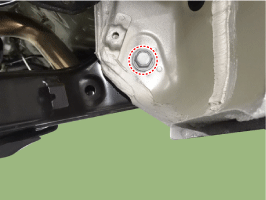
Loosen the mounting bolt and then remove the wheel speed sensor cable bracket (A) and parking brake cable bracket (B).
|

| 10. |
Remove the fixed clip and then lift up the wheel housing.
|
| 11. |
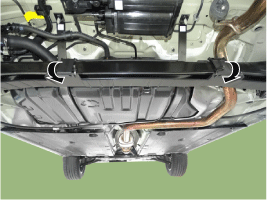
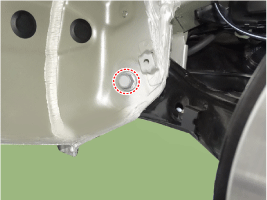
Loosen the mounting bolt and then remove the torsion beam axle.
[RH]
[LH]
|
| 12. |
To install, reverse the removal procedure. |
| 13. |
Check the front alignment.
(Refer to Suspension System - "Front Alignment") |
 Sub Frame Repair procedures
Removal
1.
Loosen the wheel nuts slightly.
2.
Raise the vehicle, and make sure it is securely supported.
3.
Remove the front wheel and tire (A) from front hub.
Tightening torque :
107. ...
Other information:
Hyundai Elantra AD (2016-2020) Service Manual: Engine Mounting Repair procedures
Removal and Installation
Engine Mounting Bracket
1.
Remove the engine room under cover.
(Refer to Engine And Transaxle Assembly - "Engine Room Under Cover")
2.
Install the jack under the edge of lower oil pan to support the engine.
ŌĆó
Put the rubber block between ...
Hyundai Elantra AD (2016-2020) Service Manual: Rear Door Trim Repair procedures
Replacement
ŌĆó
Put on gloves to prevent hand injuries.
ŌĆó
When removing with a flat-tip screwdriver or remover, wrap protective tape around the tools to prevent damage to components.
ŌĆó
Be careful not to scratch the door trim and ot ...
┬® 2018-2026 www.helantraad.com
