Hyundai Elantra: Rear Combination Light Bulb Replacement / Inside lamp

Tail light (Type A)
1. Open the trunk.
2. Loosen the retaining screw of the trunk lid cover and then remove the cover.
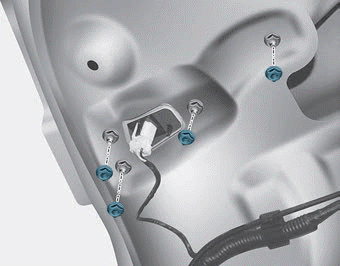
3. Disconnect the connector and then remove the nuts by turning the nuts counter clockwise.
4. Take the light assembly out.
5. Remove the socket from the assembly by turning the socket counterclockwise until the tabs on the socket align with the slots on the assembly.
6. Remove the bulb by pulling it out.
7. Insert a new bulb by inserting it into the socket.
8. Install the light assembly to the trunk.
9. Reinstall the nuts and connector and then the trunk lid cover by pushing in the screw.
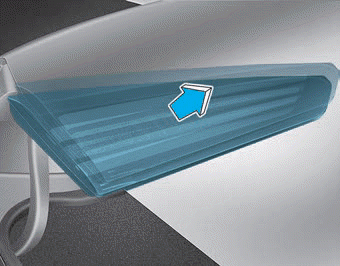
Stop/Tail light (Type B)
Your vehicle is equipped with LED lamps. LED lamps do not have replaceable bulbs. If the LED lamp does not operate, have the vehicle checked by an authorized HYUNDAI dealer.
Backup lamp (Type A/Type B)
If the light bulb does not operate, have the vehicle checked by an authorized HYUNDAI dealer.
 Rear Combination Light Bulb Replacement
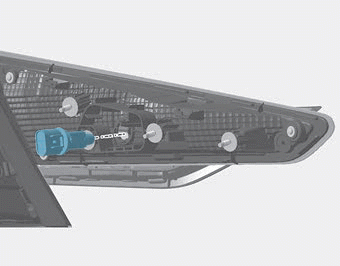
■ Type A
Type A
(1) Tail lamp
(2) Stop/Tail lamp
(3) Turn signal lamp
(4) Side marker
(5) Back-up lamp
■ Type B
Type B
(1) Stop (LED)
(2) Tail lamp (LED)
(3) Turn signal lamp
(4) S ...
 High Mounted Stop Light Replacement
1. Open the trunk.
2. Remove the socket by turning it counterclockwise until the tabs on the socket
align with the slots.
3. Remove the bulb from the socket by pressing it in and rotating it c ...
Other information:
Hyundai Elantra AD (2016-2020) Service Manual: Exhaust Manifold Components and Components Location
Components
1. Heat protector2. Exhaust manifold gasket3. Exhaust manifold4. Exhaust manifold stay
...
Hyundai Elantra AD (2016-2020) Owners Manual: Auto Door Lock/ Unlock Features
Impact sensing door unlock
All doors will be automatically unlocked when an impact causes the air bags to
deploy.
Speed sensing door lock
All doors will be automatically locked when vehicle speed exceeds 9 mph (15 km/h).
All of the doors will be automatically unlocked after the engine is turne ...
