Hyundai Elantra: Body (Interior and Exterior) / Hood
Repair procedures
| Adjustment |
| 1. |
After loosening the hinge (A) mounting bolt, adjust the hood
(B) by moving it up and down or from side to side and tighten the bolt. |
| 2. |
Adjust the hood height by moving the hood overslam bumpers (C) up and down. |
| 3. |
After loosening the hood latch (D) mounting bolts, adjust the latch by moving it up and down or from side to side.
|

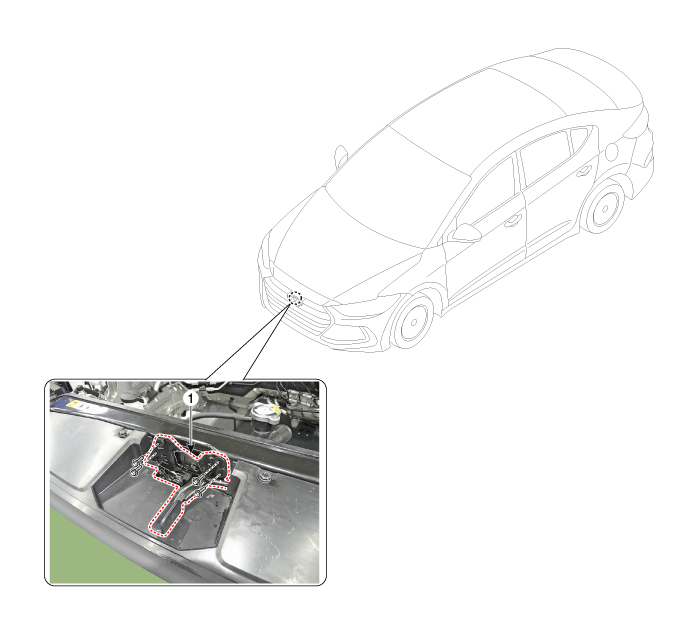
Hood Assembly Components and Components Location
| Component Location |
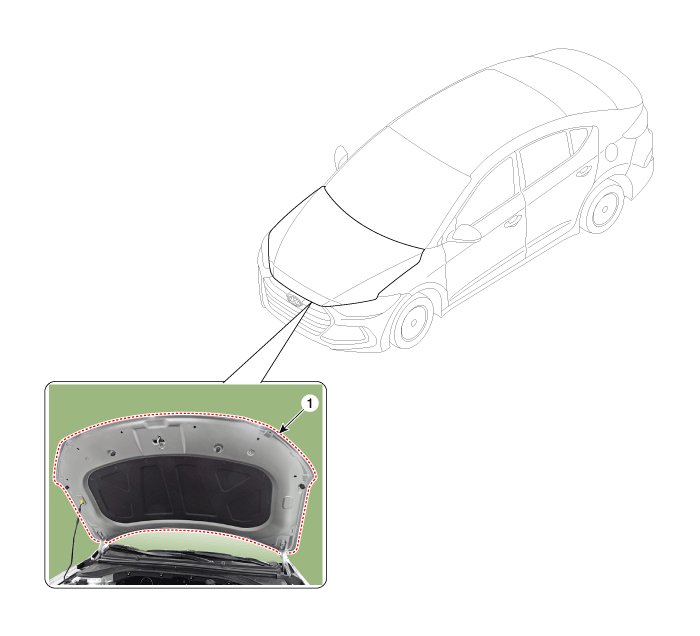
| 1. Hood assembly |
Hood Assembly Repair procedures
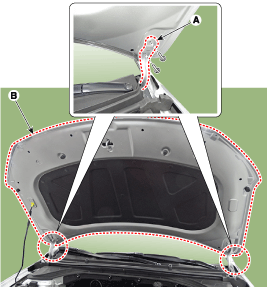
| Replacement |
|

|

| 1. |
After loosening the hood hinge (A) mounting bolts, remove the hood assembly (B).
|
| 2. |
To intall, reverse the removal procedure.
|
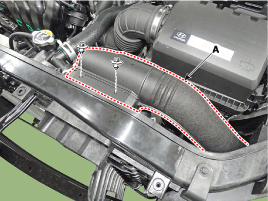
Hood Insulator Pad Repair procedures
| Replacement |
| 1. |
Using a clip remover, remove the clips and then the hood insulator pad (A).
|
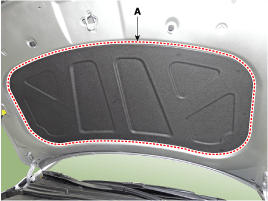
| 2. |
To intall, reverse the removal procedure.
|
Hood Weatherstrip Repair procedures
| Replacement |
| 1. |
Remove the hood weatherstrip (A).
|
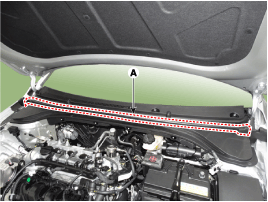
| 2. |
To intall, reverse the removal procedure. |
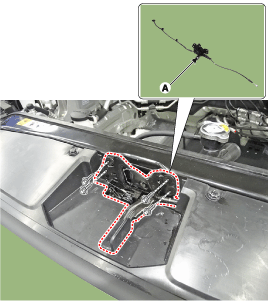
Hood Latch Release Handle Components and Components Location
| Component Location |
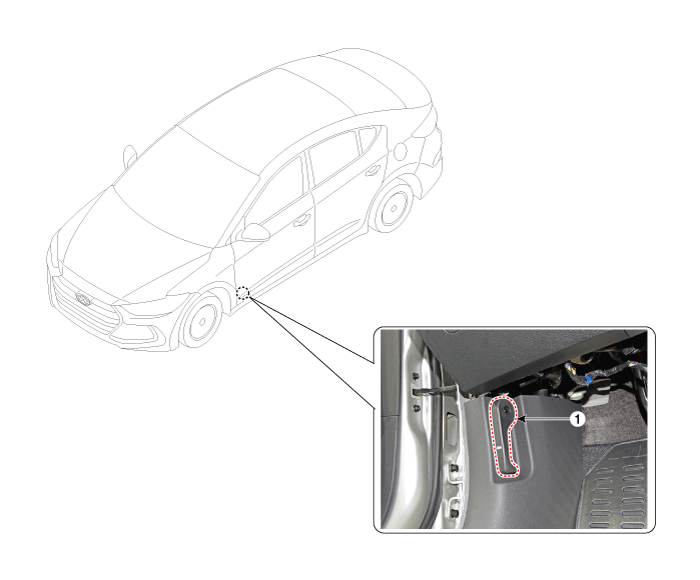
| 1. Hood latch release handle |
Hood Latch Release Handle Repair procedures
| Replacement |
| 1. |
Using a socket (B), remove the hood release handle (A).
|
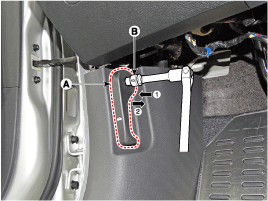
| 2. |
To intall, reverse the removal procedure.
|
Hood Latch Components and Components Location
| Component Location |
| 1. Hood latch assembly |
Hood Latch Repair procedures
| Replacement |
| 1. |
Remove the front bumper.
(Refer to Front Bumper - "Front Bumper Cover") |
| 2. |
Loosen the mounting clips and remove the air duct (A).
|
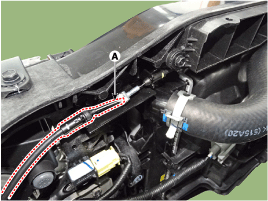
| 3. |
Disconnect the hood latch release cable (A).
|
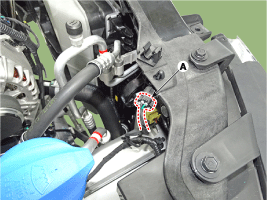
| 4. |
Disconnect the connector (A), then remove the wiring mounting clips.
|
| 5. |
Loosen the mounting bolts (A) and disengage the filer neck assembly.
|
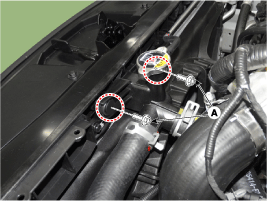
| 6. |
Loosen the mounting bolts and remove the hood latch assembly (A).
|
| 7. |
To intall, reverse the removal procedure.
|
Other information:
Hyundai Elantra AD (2016-2020) Owners Manual: Distributing the sealant
9. Immediately drive approximately 7~10 km (4~6 miles or, about 10min) to evenly
distribute the sealant in the tire.
Do not exceed a speed of 80 km/h (50 mph). If possible, do not fall below a speed
of 20 km/h (12 mph).
While driving, if you experience any unusual vibration, ride disturbance ...
Hyundai Elantra AD (2016-2020) Owners Manual: System Malfunction
Check Driver Attention Warning (DAW) system
When the warning message appears, the system is not working properly. In this
case, have the vehicle inspected by an authorized HYUNDAI dealer.
WARNING
The Driver Attention Warning system is not a substitute for safe driving
practices, but a c ...
