Hyundai Elantra: Body Dimensions / Front Body Body Repair
Hyundai Elantra AD (2016-2020) Service Manual / Body (Interior and Exterior) / Body Dimensions / Front Body Body Repair
| Front Body A |
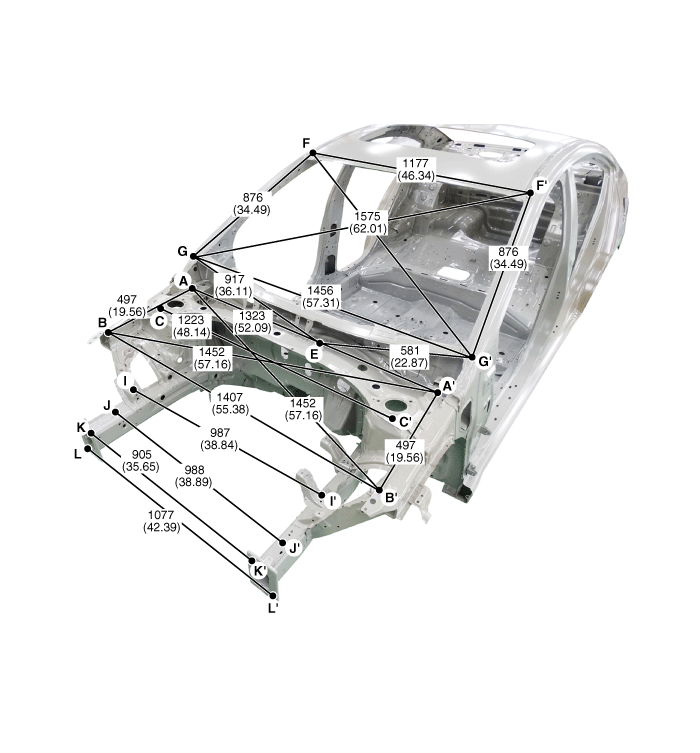
| * These dimensions indicated in this figure are actual-measurement dimensions. [ Unit : mm (inch) ] |
| Front Body B |
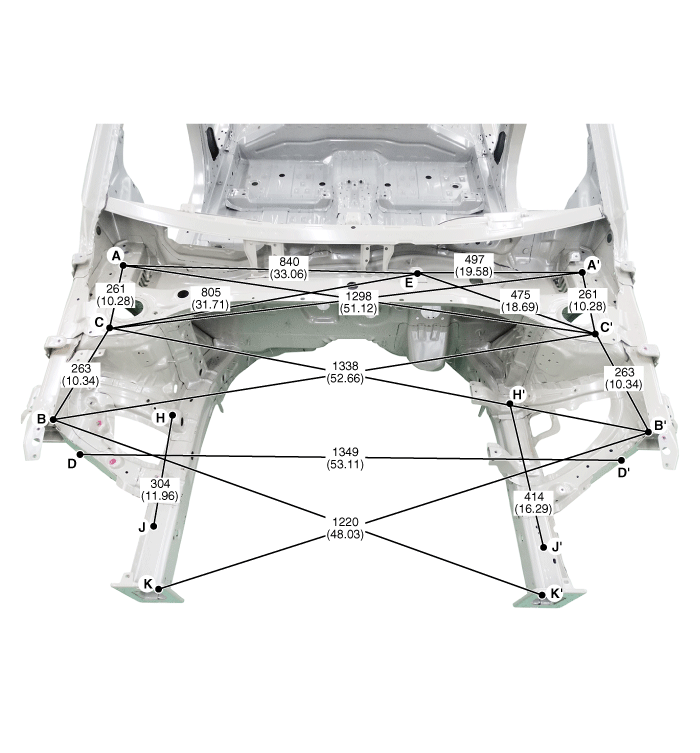
| * These dimensions indicated in this figure are actual-measurement dimensions. [ Unit : mm (inch) ] |
| Front Body C |
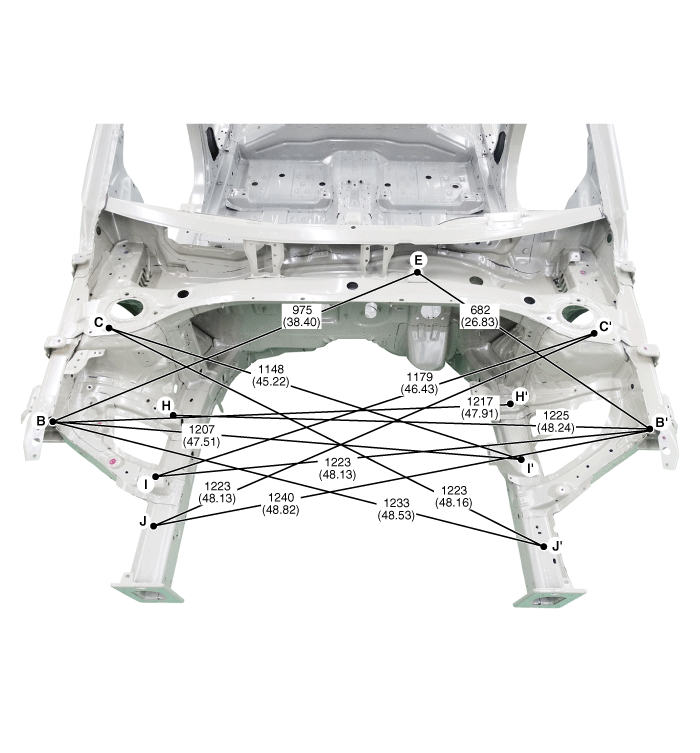
| * These dimensions indicated in this figure are actual-measurement dimensions. [ Unit : mm (inch) ] |
| Front Body D |
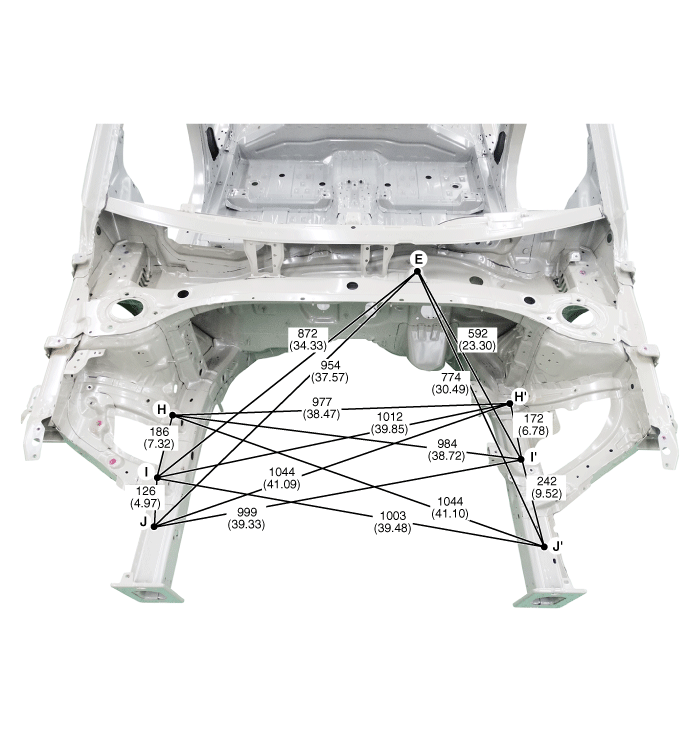
| * These dimensions indicated in this figure are actual-measurement dimensions. [ Unit : mm (inch) ] |
|
|
|
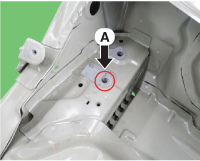
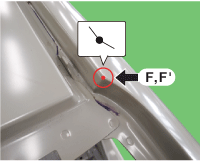
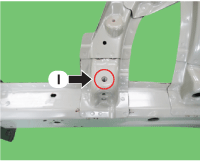
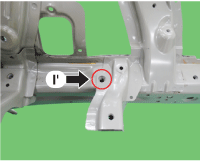
| Hood hinge mounting hole (O11) | Hood hinge mounting hole (O11) | Fender apron upper panel corner |
|
|
|
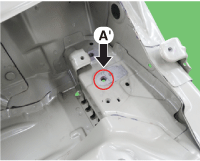
| Fender apron upper panel corner | Front shock absorber mounting hole (O15) | Front shock absorber mounting hole (O15) |
|
|
|
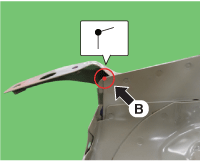
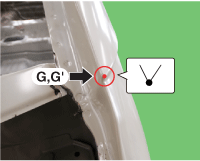
| Wiring tooling hole (O7) | Wiper motor bracket mounting hole (O6.6) | Front pillar outer corner |
|
|
|
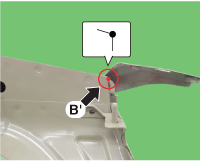
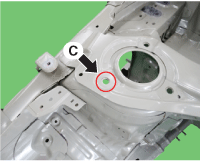
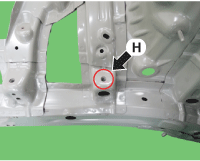
| Front pillar outer corner | Engine mounting bracket hole (O11) | Transaxle mounting hole (O12) |
|
|
|
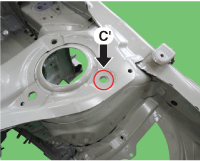
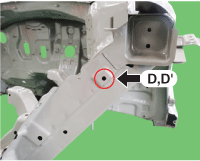
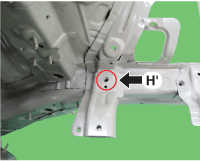
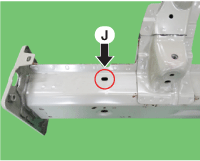
| Engine mounting bracket hole (O11) | Transaxle mounting hole (O15) | Wiring mounting hole (7X12) |
|
| |
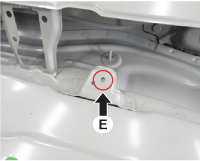
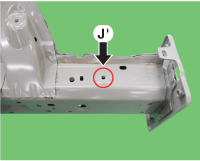
| Front side member mounting hole (O6.6) | Front end module mounting hole (O9) |
 General Information
General
1.
This measurements are provided as reference for A/S, so it can not be used as specification.
2.
Basically, all measurements in this manual are taken with a tracking gauge.
3.
W ...
 Side Body Body Repair
* These dimensions indicated in this figure are actual-measurement dimensions. [ Unit : mm (inch) ]
Fornt side outer member mounting hole (O6.6)Fornt side outer member mounting hole (O6.6)Fen ...
Other information:
Hyundai Elantra AD (2016-2020) Service Manual: Crash Pad Lower Panel Repair procedures
Replacement
•
Put on gloves to prevent hand injuries.
•
When removing with a flat-tip screwdriver or remover, wrap protective tape around the tools to prevent damage to components.
•
Use a plastic panel removal tool to remove int ...
Hyundai Elantra AD (2016-2020) Service Manual: Description and Operation
Function Of Safety Power Window
When driver door power window auto-up switch is operated, safety function is activated.
1.
Safety function condition
When detect the force of 100N (using the 10N/mm spring) during the window rising, window is reversed.
2.
Length of window reversing (except h ...
© 2018-2026 www.helantraad.com
