Hyundai Elantra: Brake System / Brake Line Repair procedures
Hyundai Elantra AD (2016-2020) Service Manual / Brake System / Brake System / Brake Line Repair procedures
| Removal |
| 1. |
Disconnect the negative (-) battery cable. |
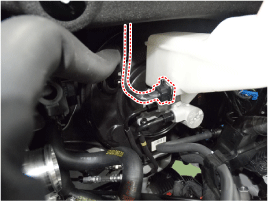
| 2. |
Disconnect the brake fluid level switch connector.
|
| 3. |
Remove the brake fluid from the master cylinder reservior with a syringe.
|

| 4. |
Remove the wheel & tire. |
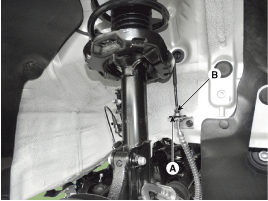
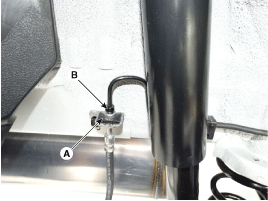
| 5. |
Remove the brake hose clip (A). |
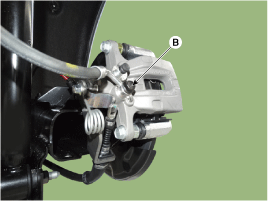
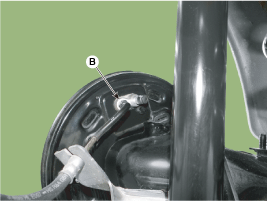
| 6. |
Disconnect the brake tube by loosening the tube flare nut (B).
[Front]
[Rear]
|
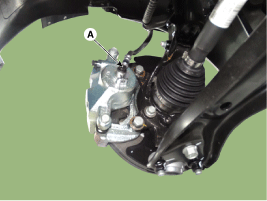
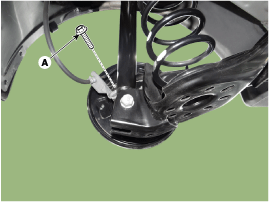
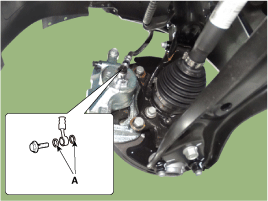
| 7. |
Disconnect the brake hose by loosening the bolt (A)&(B).
[Front]
[Rear disc]
[Rear drum]
|
| 8. |
Remove the brake hose bracket by loosening the bolt(A). [Drum brake only]
|
| Inspection |
| 1. |
Check the brake tubes for cracks, crimps and corrosion. |
| 2. |
Check the brake hoses for cracks, damage and fluid leakage. |
| 3. |
Check the brake tube flare nuts for damage and fluid leakage. |
| 4. |
Check brake hose mounting bracket for crack or deformation. |
| Installation |
| 1. |
To install, reverse the removal procedure.
|
| 2. |
After installing, bleed the brake system.
(Refer to Brake System -"Brake System Bleeding")
(Refer to Brake system - "ABS System Bleeding)
(Refer to Brake system - "ESP System Bleeding) |
| 3. |
Check the spilled brake oil. |
 Brake Line Components and Components Location
Components
[DISC TYPE]
[DRUM TYPE]
...
 Brake Pedal Components and Components Location
Components
1. Stop lamp switch2. Brake pedal member assembly3. Return spring4. Bolt5. Brake pedal arm assembly
...
Other information:
Hyundai Elantra AD (2016-2020) Service Manual: Drive Belt Tensioner Repair procedures
Removal and Installation
1.
Disconnect the drive belt.
(Refer to Timing System - "Drive Belt")
2.
Remove the drive belt tensioner (A).
Tightening torque :
center bolt : 29.4 ~ 41.2 N.m (3.0 ~ 4.2 kgf.m, 21.7 ~ 30.4 lb-ft)
fxing bolt : 39.2 ~ 49.0 N.m (4.0 ~ 5.0 kgf.m, 28.9 ~ 36.2 lb-ft ...
Hyundai Elantra AD (2016-2020) Service Manual: Rear Drum Brake Components and Components Location
Components
1. Shoe hold down pin 2. Shoe adjuster 3. Upper return spring4. Adjusting lever5. Shoe6. Adjusting spring7. Lower return spring8. Shoe hold spring
...
© 2018-2026 www.helantraad.com
