Hyundai Elantra: AVN System / AVN(Audio Video Navigation) head unit Repair procedures
| • |
Take care not to scratch the cluster fascia panel and related parts. |
| • |
Eject all the disc before removing the AVN head unit to prevent damaging the DVD player's load mechanism. |
| • |
Wrap the protective tape on the tool to disassemble with the screwdriver or remover. |
| • |
Use caution in keeping and handling during disassembling/assembling because it is easily contaminated with lubricant and oil. |
|
| 1. |
Disconnect the negative (-) battery terminal. |
| 2. |
Remove the center fascia panel.
(Refer to Body - "Center Fascia Panel") |
| 3. |
Remove the AVN head unit (A) after loosening the mounting bolts. 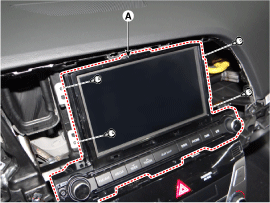
|
| 4. |
Remove the AVN head unit connectors and cables (A). 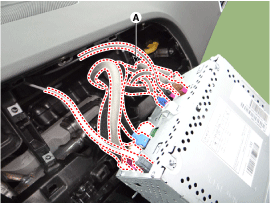
| • |
If DVD does not eject, don't try to remove it. |
| • |
The DVD player may get damaged. |
| • |
Contact the nearest dealer for assistance. |
|
|
| 1. |
Install the AVN head unit after connecting the AVN head unit connectors and cable. |
| 2. |
Install the center fascia panel. |
| 3. |
Connect the negative (-) battery terminal.
| • |
Make sure that the cables and connectors are plugged in properly. |
| • |
Check the AVN system. |
|
|
Components
Connector Pin Information
NoConnector AConnector BConnector C1-Multmedia-CAN (High)Chassis-CAN (Low)2--Chassis-CAN (High)3---4-Steering wheel remote controller-5SPDIF Shield GND--6SPD ...
Components
NoConnector ANoConnector B1BATT (+)1Subwoofer 2 (+)2BATT (+)2Subwoofer 1 (+)3BATT (+)3Front door tweeter speaker - RH (+)4BATT (+)4Front door tweeter speaker - LH (+)5-5-6Multimedia CA ...


 AVN(Audio Video Navigation) head unit Components and Components Location
 External AMP Components and Components Location