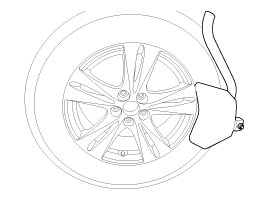
Hyundai Elantra: Tire Pressure Monitoring System / TPMS Sensor Repair procedures
Hyundai Elantra AD (2016-2020) Service Manual / Suspension System / Tire Pressure Monitoring System / TPMS Sensor Repair procedures
| Removal |
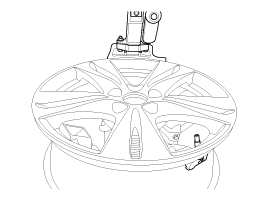
| 1. |
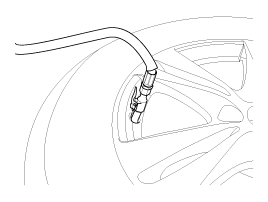
Remove the valve core and deflate the tire. |
| 2. |
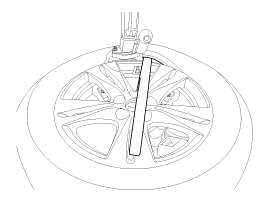
Remove the side of the tire bead area from the wheel using tire changing machine .
|

| 3. |
Rotate the wheel clockwise.
|
| 4. |
The valve during transportation (air inlet portion of the
silver) deviated from its original location be sure to check whether the
original position of the valve (metal brackets) are assembled in
indented state. |
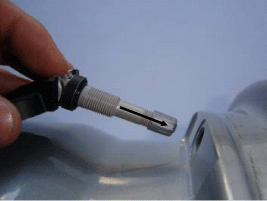
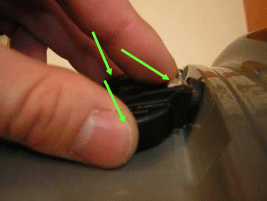
| 5. |
While tightening the nut on the valve as not to deviate from
the fixed position while rotating the valve to a fixed location (metal
brackets to fit inside) and push. The specified torque (8Nm) to tighten
the nut does not reuse. |
| 6. |
Contact with the rim so that the valve washer seals the valve hole put into.
|
| 7. |
Housing with two fingers holding the valve in the axial direction with one finger and push the valve.
|
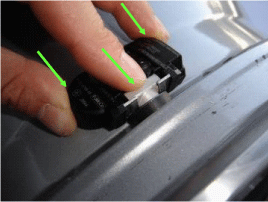
| 8. |
Housing, the state must be visible laser marking.
|
| 9. |
When the valve is fully inserted so that the contact between
the sensor and the rim while keeping hands on the wheel nut tightening
will start Wed.
|
| 10. |
While maintaining the position of the valve and the sensor is mounted nut.
|
| 11. |
Apply tire soap or lubrication to the top and bottom tire beads.
|

| 12. |
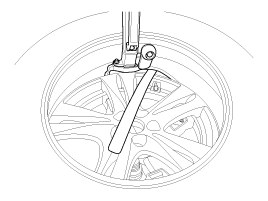
To fit the bottom bead, position the sensor at the 5 o’clock position relative to the head on the tire changing machine
|
| 13. |
Place the tire on the rim so the bottom bead touches the edge
of the rim after the sensor (6 o’clock). Rotate the rim clockwise, and
push down on the tire at the 3 o’clock position to fit bottom bead.
|
| 14. |
After bottom bead is on tire, rotate the rim until the sensor
is at the 5 o’clock position relative to the head on the tire changing
machine. Push down on the tire at the 3 o’clock position and rotate the
rim clockwise to fit the top bead.
|
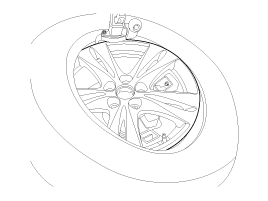
| 15. |
Inflate the tire until both beads seat.
|
| 16. |
In the case of TPMS sensor failure, TPMS sensor needs
learning. Faulty sensor is replaced new units, conduct learning of TPMS
sensors. |
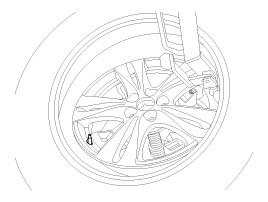
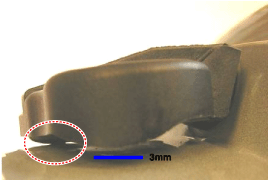
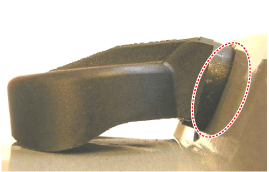
| Inspection |
After installing TPMS sensor test methods Thai
| 1. |
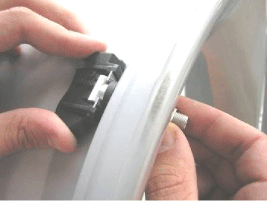
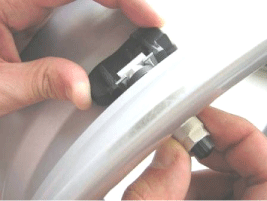
Sealing washer on the outside rim of hole to be compressed. |
| 2. |
The lower part of the valve housing, a fixed place (no metal brackets) should be located. |
| 3. |
Housing is at least one or more points on the surface of the rim should contact. |
| 4. |
The rim of the housing mounting height shall not exceed the height of the chin.
[Normally]
[Faulty]
|
Diagnosis procedure by using diagnostic device
As manual for diagnosis methods by using diagnosis device, the main contents are as follows:
| 1. |
Connect self-diagnosis connector(16pins) located in the lower
of driver side crash pad to self-diagnosis device, and then turn the
self-diagnosis device after key is ON. |
| 2. |
Select the "vehicle model" and "TPMS" on GDS vehicle selection screen, then select OK. |
| Diagnostic Procedure Using a Diagnostic Instrument |
The following section describes how to diagnose faults using a diagnostic instrument.
| 1. |
Connect the diagnostic instrument to the self-diagnostic
connector (16-pin) beneath the crash pad on the side of driver's seat,
and then turn on the ignition to activate the diagnostic instrument. |
| 2. |
In the GDS Vehicle Type Selection menu, select "Vehicle Type" and "TPMS" System, and then opt for "OK."
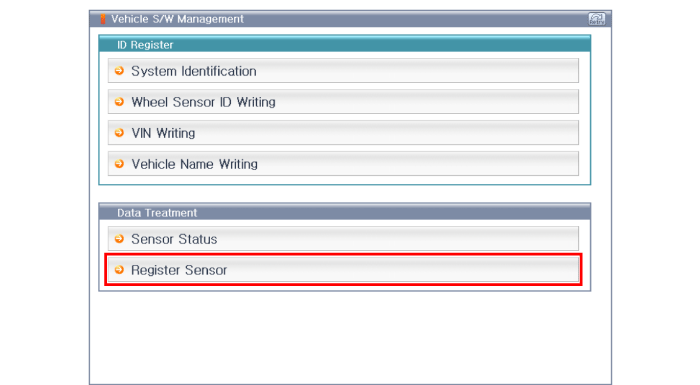
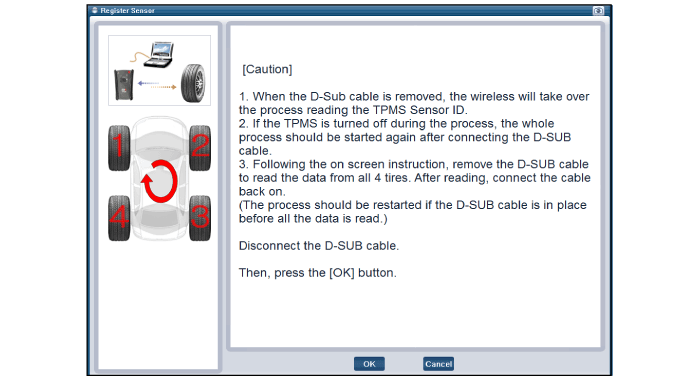
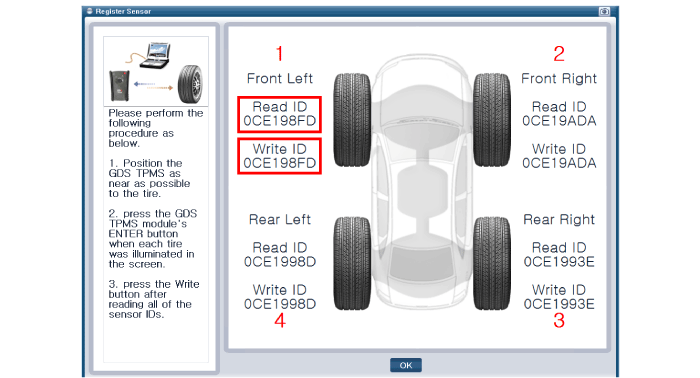
[Initial Screen for Sensor ID Registration]
[Register Sensor function description]
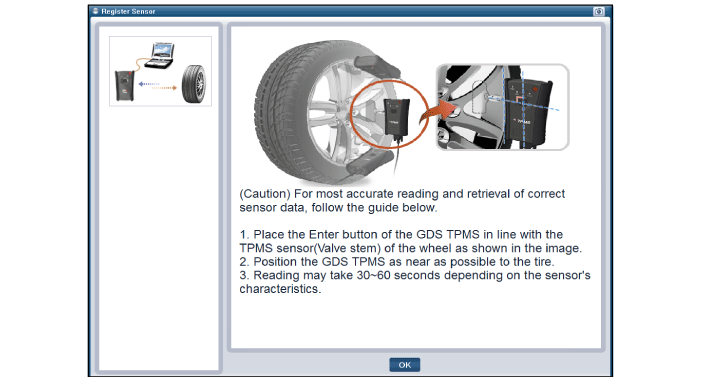
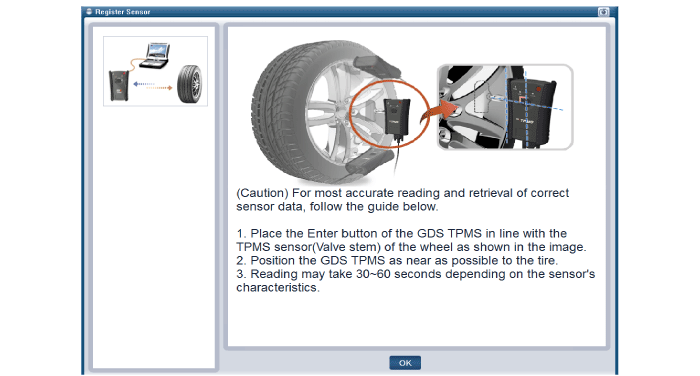
[Preparation phase sensor measurements]
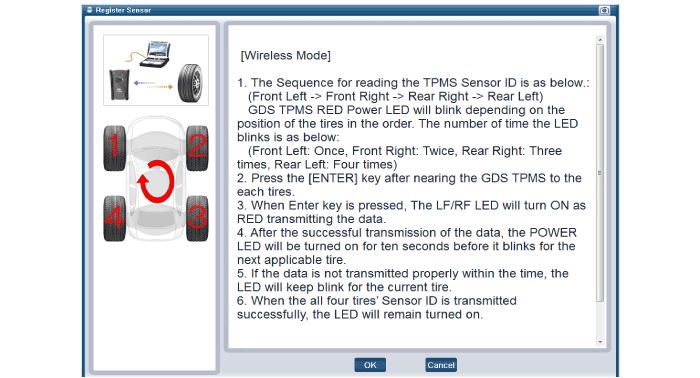
[Sensor register method 1]
[Sensor register method 2]
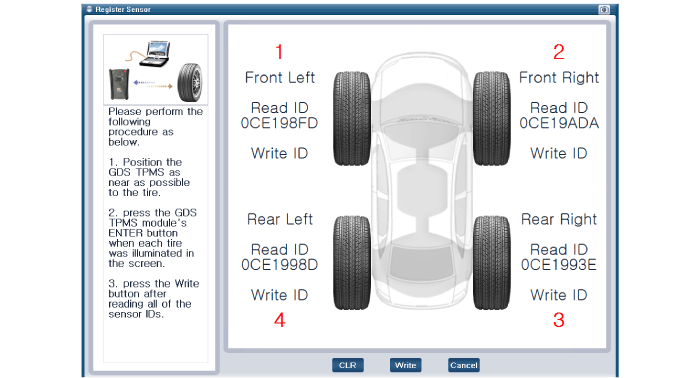
[Sensor register method 3]
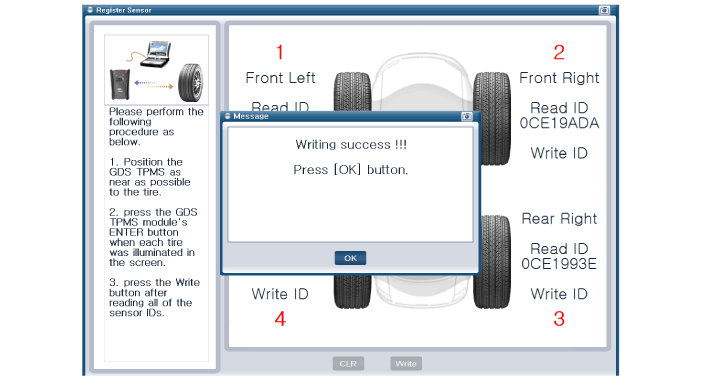
[Sensor register method 4]
[Sensor register method 5]
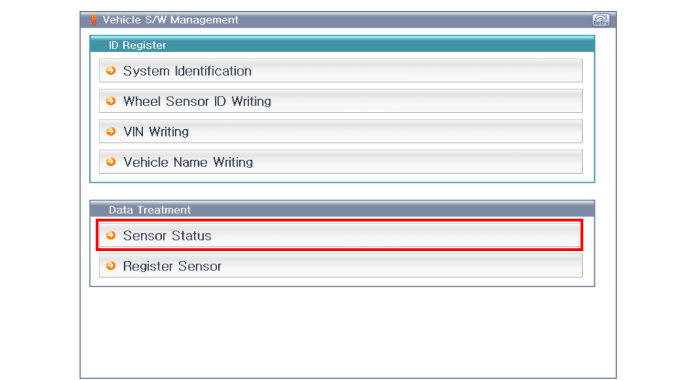
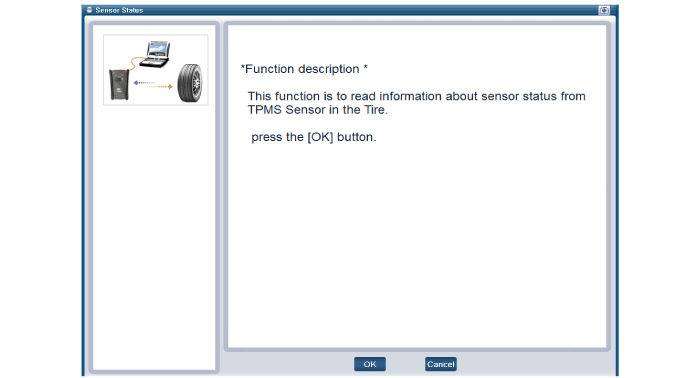
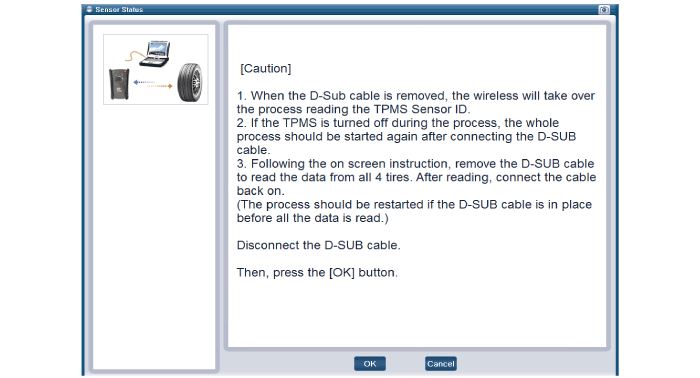
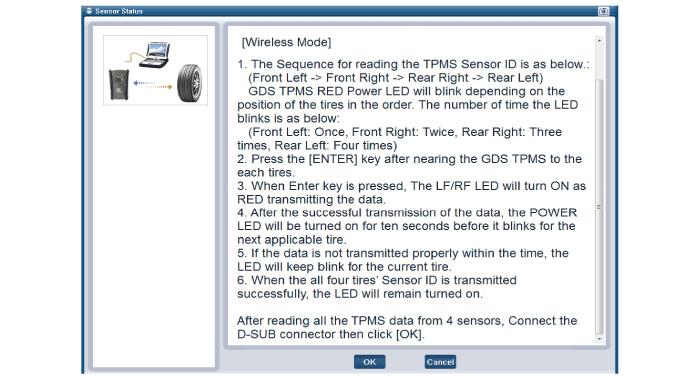
[Sensor Status initialization]
[Sensor function description]
[Preparation phase sensor measurements]
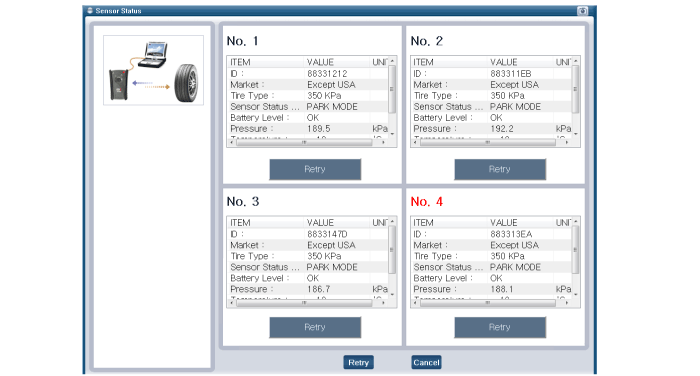
[Sensor measurements 1]
[Sensor measurements 2]
[Sensor Status]
|


 TPMS Sensor Description and Operation
Description
1.
General description
WU is a sensor placed in the tire that reports pressure and temperature.
The WU is mounted inside the wheels, fixed to the valve. The angle between the valve ...
 TPMS Receiver Description and Operation
Description
TPMS Receiver : BCM(body control module) integrated management
1.
Mode
(1)
Virgin State
A.
The receiver as a sole part is shipped in this state. Replacement parts should therefo ...
Other information:
Hyundai Elantra AD (2016-2020) Service Manual: Alternator Schematic Diagrams
Circuit Diagram
•
COM signal - When
controlling the voltage generated, the ECM sends the target voltage data
to the alternator via a PWM signal.(High voltage: 4V or higher, low
voltage: 2V or lower)
•
FR signal - The
transistor activation signal inside t ...
Hyundai Elantra AD (2016-2020) Owners Manual: Head Restraints
The vehicle's front and rear seats have adjustable head restraints. The head
restraints provide comfort for passengers, but more importantly they are designed
to help protect passengers from whiplash and other neck and spinal injuries during
an accident, especially in a rear impact collisi ...
© 2018-2026 www.helantraad.com
