Hyundai Elantra: Fuel Filler Door / Repair procedures
| Replacement |
| [Fuel filler door] |
|
|
| 1. |
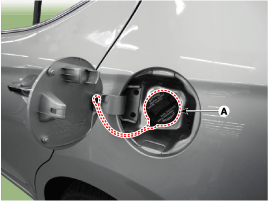
Open the fuel filler door (A).
|
| 2. |
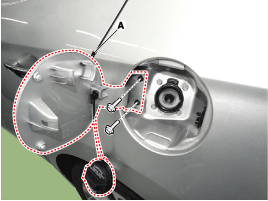
Loosen the mounting bolts and remove the fuel filler door (A).
|
| 3. |
To intall, reverse the removal procedure.
|
| [Fuel filler door cable] |
|
| 1. |
Remove the front seat assembly.
(Refer to Front Seat - "Front Seat Assembly") |
| 2. |
Remove the rear seat assembly.
(Refer to rear Seat - "Rear Seat Assembly") |
| 3. |
Remove the floor console assembly.
(Refer to Floor Console - "Floor Console Assembly") |
| 4. |
Remove the center pillar lower trim.
(Refer to Interior Trim - "Center Pillar Trim") |
| 5. |
Remove the cowl side trim.
(Refer to Interior Trim - "Cowl Side Trim") |
| 6. |
Remove the luggage side trim.
(Refer to Interior Trim - "Cowl Side Trim") |
| 7. |
Remove the floor carpet.
(Refer to "Floor carpet") |
| 8. |
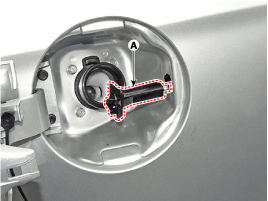
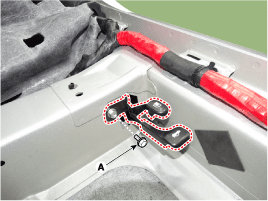
Loosen the mounting bolt and remove the fuel filler door catch (A).
|
| 9. |
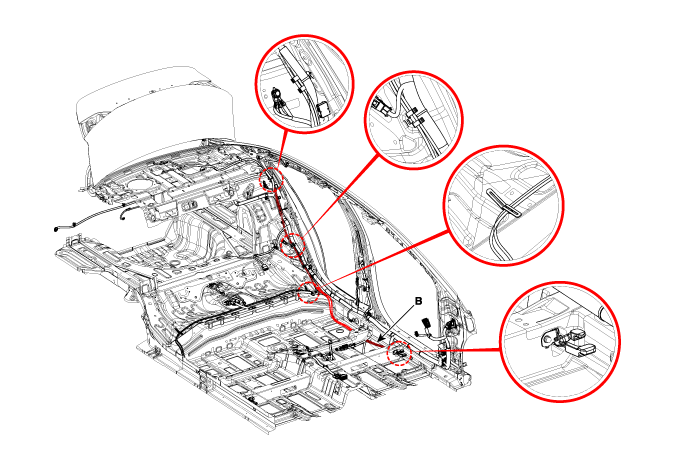
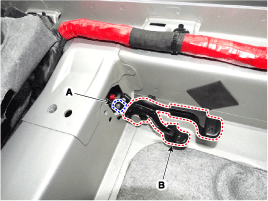
Disconnect the fuel filler door barcket (A), remove the cable (B).
|
| 10. |
To intall, reverse the removal procedure.
|
| [Fuel filler door catch] |
| 1. |
Remove the front seat assembly [LH].
(Refer to Front Seat - "Front Seat Assembly") |
| 2. |
Remove the front door scuff trim [LH].
(Refer to Interior Trim - "Front Door Scuff Trim") |
| 3. |
Remove the cowl side trim [LH].
(Refer to Interior Trim - "Cowl Side Trim") |
| 4. |
Remove the floor console assembly.
(Refer to Floor Console - "Floor Console Assembly") |
| 5. |
Separate the floor carpet to obtain space for removing the rear heating duct. |
| 6. |
Loosen the fuel filler door catch mounting bolt (A).
|
| 7. |
Detach the cable (A) and remove the fuel filler door catch (B).
|
| 8. |
To intall, reverse the removal procedure.
|
 Components and Components Location
Component Location
1. Fuel filler door
...
 Front Door
...
Other information:
Hyundai Elantra AD (2016-2020) Owners Manual: Driver Position Memory System
The Driver Position Memory System is provided to store and recall the following
memory settings with a simple button operation.
- Driver's seat position
- Side view mirror position
- Instrument panel illumination intensity
If the battery is disconnected, the position memory will be lost ...
Hyundai Elantra AD (2016-2020) Owners Manual: Securing a child restraint seat with "Tether Anchor" system
First secure the child restraint with the LATCH lower anchors or the seat belt.
If the child restraint manufacturer recommends that the top tether strap be attached,
attach and tighten the top tether strap to the top tether strap anchor.
Child restraint hook holders are located on the package ...


