Hyundai Elantra: Rear Seat / Rear Seat Back Cover Repair procedures
| Replacement |
| [LH] |
|

|

| 1. |
Remove the rear seat assembly [LH].
(Refer to Rear Seat - "Rear Seat Assembly") |
| 2. |
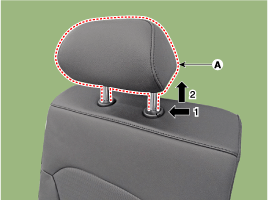
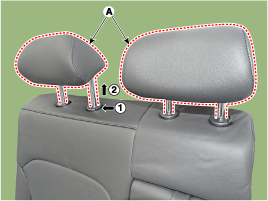
Push the lock pins, and remove the rear seat headrest (A).
|
| 3. |
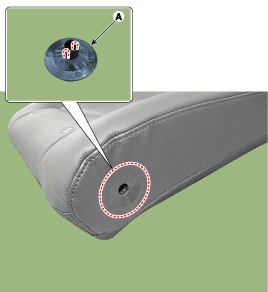
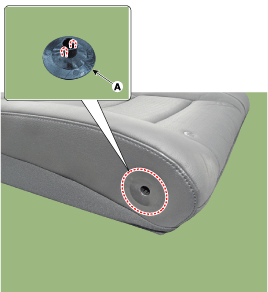
Using a screwdriver or remover, remove the cap (A).
|
| 4. |
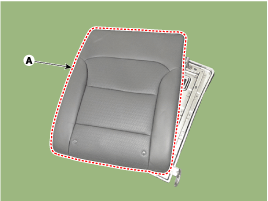
Using a screwdriver or remover, remove the rear seat back cover (A).
|
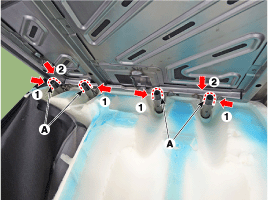
| 5. |
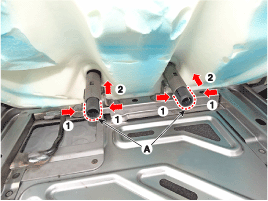
Pull out the rear seat headrest guides (A) while pinching both sides of the lower part of the guides, and remove them.
|
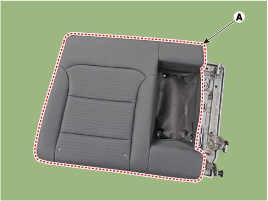
| 6. |
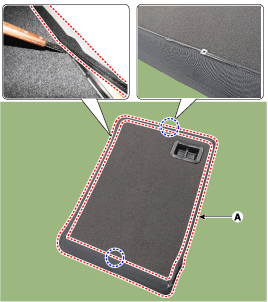
Remove the rear seat back cover assembly (A) from the rear seat back frame.
|
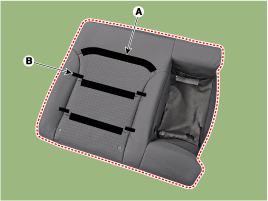
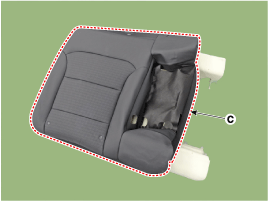
| 7. |
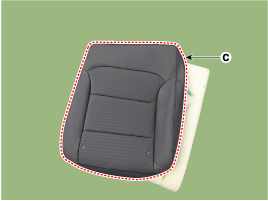
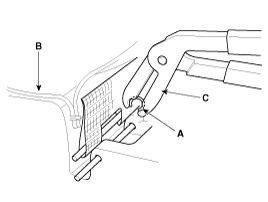
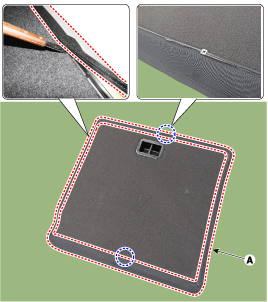
After removing the Velcro tape (A) and hog-ring clips (B)
inside the rear seat cushion cover, remove the seat cushion cover (C).
|
| 8. |
To intall, reverse the removal procedure.
|
| [RH] |
|
|

| 1. |
Remove the rear seat assembly [RH].
(Refer to Rear Seat - "Rear Seat Assembly") |
| 2. |
Remove the rear back armrest.
(Refer to Rear Seat - "Rear Back Armrest") |
| 3. |
Push the lock pins, and remove the rear seat headrest (A).
|
| 4. |
Using a screwdriver or remover, remove the cap (A).
|
| 5. |
Using a screwdriver or remover, remove the rear seat back cover (A).
|
| 6. |
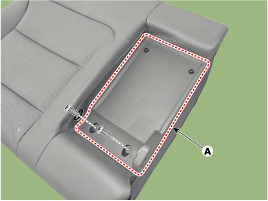
Remove the rear seat armrest board (A).
|
| 7. |
Pull out the rear seat headrest guides (A) while pinching both sides of the lower part of the guides, and remove them.
|

| 8. |
Remove the rear seat back cover assembly (A) from the rear seat back frame.
|
| 9. |
After removing the Velcro tape (A) and hog-ring clips (B)
inside the rear seat cushion cover, remove the seat cushion cover (C).
|
| 10. |
To intall, reverse the removal procedure.
|
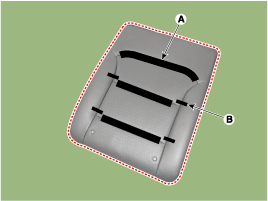
 Rear Seat Back Cover Components and Components Location
Component Location
1. Rear seat back cover [LH]2. Rear seat back cover [RH]
...
 Rear Seat Cushion Cover Components and Components Location
Component Location
1. Rear seat cushion cover
...
Other information:
Hyundai Elantra AD (2016-2020) Service Manual: Output Speed Sensor Description and Operation
Description
The output speed sensor is a vital unit that measures the
rate of rotation of the transaxle's turbine shaft and output shaft, and
delivers the readings to the TCM. The sensor provides critical input
data that's used in feedback control, damper clutch control, gear
setting co ...
Hyundai Elantra AD (2016-2020) Service Manual: Front Disc Brake Repair procedures
Removal
1.
Loosen the wheel nuts slightly.
Raise the vehicle, and make sure it is securely supported.
2.
Remove the front wheel and tire (A) from front hub .
Tightening torque:
107.9 ~ 127.5 N.m (11.0 ~ 13.0 kgf.m, 79.6 ~ 94.0 lb-ft)
•
Be careful not to da ...
