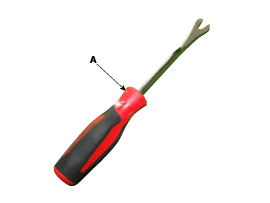
Hyundai Elantra: Interior Trim / Rear Pillar Trim Repair procedures
Hyundai Elantra AD (2016-2020) Service Manual / Body (Interior and Exterior) / Interior Trim / Rear Pillar Trim Repair procedures
| Replacement |
|
|
| 1. |
Slighty remove the rear door body side weatherstrip. |
| 2. |
Remove the rear pillar trim.
|
| 3. |
To intall, reverse the removal procedure.
|
 Rear Pillar Trim Components and Components Location
Component Location
1. Rear pillar trim
...
 Rear Package Tray Trim Components and Components Location
Component Location
1. Package tray trim
...
Other information:
Hyundai Elantra AD (2016-2020) Service Manual: Automatic Transaxle Repair procedures
Removal
1.
Remove the engine cover.
(Refer to Engine Mechanical System - "Engine cover")
2.
Remove the air cleaner assembly and air duct.
(Refer to Engine Mechanical System - "Air cleaner")
3.
Remove the battery and battery tray.
(Refer to Engine Electrical System - "Battery")
4 ...
Hyundai Elantra AD (2016-2020) Service Manual: Battery Components and Components Location
Components
1. Battery insulation pad2. AMG Battery3. Battery tray4. Battery mounting bracket5. Battery sensor
...
© 2018-2026 www.helantraad.com


