
Hyundai Elantra: Body Electrical System / Power Door Locks
Hyundai Elantra AD (2016-2020) Service Manual / Body Electrical System / Power Door Locks
Components and Components Location
| Component Location |
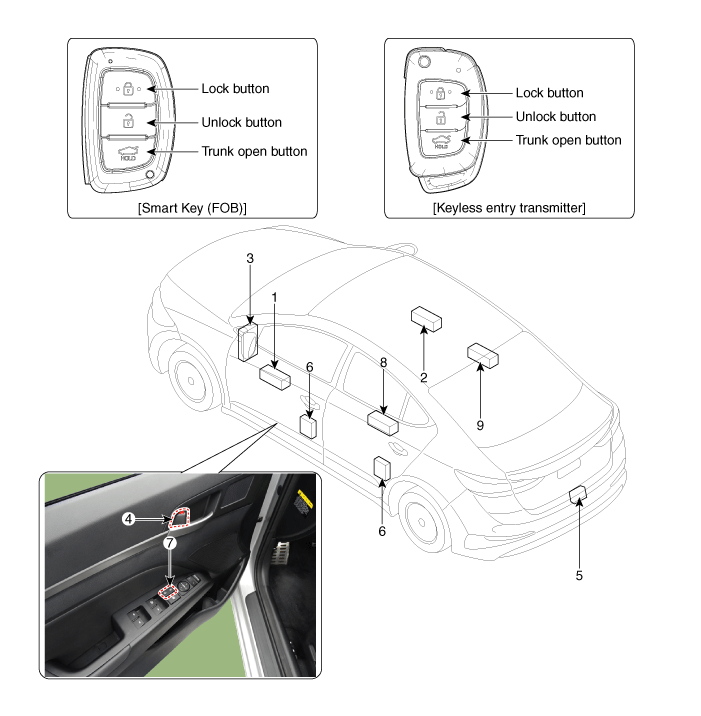
| 1. DDM (Driver Door Module) 2. ADM (Assist Door Module) 3. SJB (Smart Junction Block) 4. Door lock knob 5. Trunk lid actuator | 6. Door latch module 7. Door lock/unlock switch 8. RLDM (Rear Left Door Module) 9. RRDM (Rear Right Door Module) |
Power Door Lock Module Components and Components Location
| Conponents |
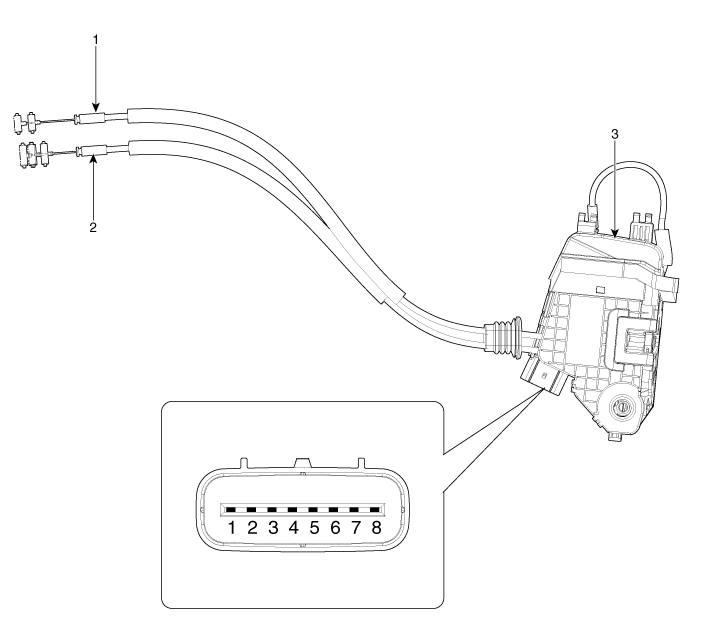
| 1. Door lock/unlock knob cable 2. Door inside handle cable | 3. Door Latch |
Power Door Lock Module Repair procedures
| Inspection |
|

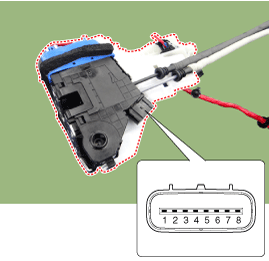
Front Door Lock Module Inspection
| 1. |
Remove the front door trim.
(Refer to Body - "Front Door Trim") |
| 2. |
Remove the front door module.
(Refer to Body - "Front Door Module") |
| 3. |
Disconnect the connector from the actuator.
| |||||||||||||||||||||||||||||
| 4. |
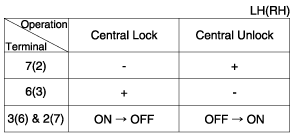
Check actuator operation by connecting power and ground
according to the table. To prevent damage to the actuator, apply battery
voltage only momentarily.
|
Rear Door Lock Module Inspection
| 1. |
Remove the rear door trim.
(Refer to Body - "Rear Door Trim") |
| 2. |
Remove the rear door module.
(Refer to Body - "Rear Door Module") |
| 3. |
Disconnect the connectors from the actuator.
| |||||||||||||||||||||||||||||
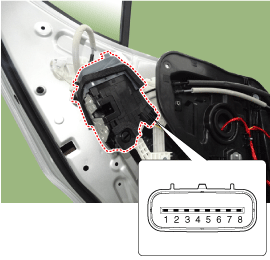
| 4. |
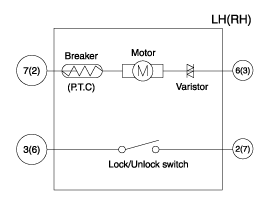
Check actuator operation by connecting power and ground
according to the table. To prevent damage to the actuator, apply battery
voltage only momentarily.
|
Trunk Lock Module Inspection
| 1. |
Remove the trunk lid trim.
(Refer to Body - "Trunk Lid Trim") |
| 2. |
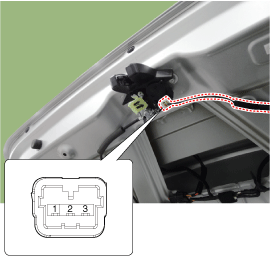
Disconnect the connector from the actuator
|
| 3. |
Check actuator operation by connecting power and ground
according to the table. To prevent damage to the actuator, apply battery
voltage only momentarily.
|
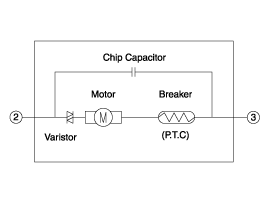
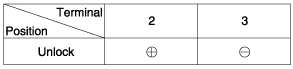
| 4. |
Checking the trunk of the vehicle power option power refers to the trunk module. |
Power Door Lock Switch Repair procedures
| Inspection |
Power Door Lock Switch Inspection
| 1. |
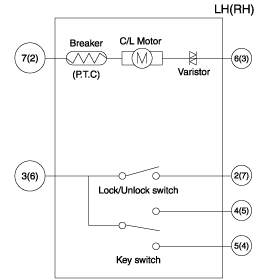
Check for continuity between the terminals. If there is an abnormality, replace the switch.
|
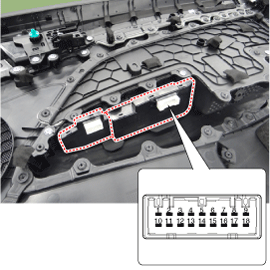
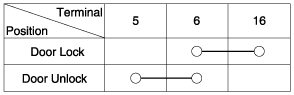
| Removal |
|
Driver Power Window Switch
| 1. |
Disconnect the negative (-) battery terminal. |
| 2. |
Remove the front door trim.
(Refer to Body - "Front Door Trim") |
| 3. |
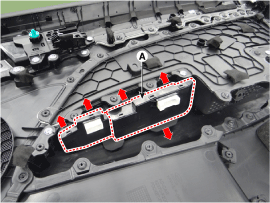
Remove the power window switch assembly after disengaging the mounting clips.
|
| Installation |
| 1. |
Install the power window switch assembly. |
| 2. |
Install the front door trim after connect the connector. |
| 3. |
Connect the negative (-) battery terminal. |
 Troubleshooting
Troubleshooting
Error ItemFailure symptomInspection items Detailed inspections Relevant Parts/ComponentsScreen displayTFT-LCD screen does not turn on
1.
Connector attachments
2.
Components
...
Other information:
Hyundai Elantra AD (2016-2020) Service Manual: Description and Operation
OBD-II review
1. Overview
The California Air Resources Board (CARB) began regulation of
On Board Diagnostics (OBD) for vehicles sold in California beginning
with the 1988 model year. The first phase, OBD-I, required monitoring of
the fuel metering system, Exhaust Gas Recirculation (EGR) sy ...
Hyundai Elantra AD (2016-2020) Service Manual: Cross Member Body Repair
Front Cross Member
* These dimensions indicated in this figure are actual-measurement dimensions. [ Unit : mm (inch) ]
Rear Cross Member
* These dimensions indicated in this figure are actual-measurement dimensions. [ Unit : mm (inch) ]
...
© 2018-2026 www.helantraad.com
