Hyundai Elantra: Convenient Features of Your Vehicle / LCD Display (For Supervision Cluster). LCD Display Modes
LCD Display Control
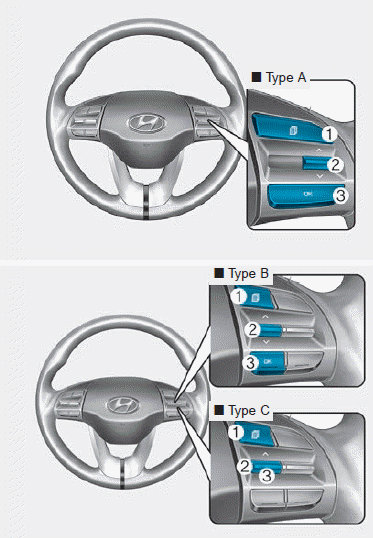
The LCD display modes can be changed by using the control buttons on the steering wheel.
(1)  : MODE button for changing modes
(2) Ō¢▓, Ō¢╝ : MOVE switch for changing items
(3) OK : SELECT/RESET button for setting or resetting the selected item
LCD Display Modes
The information provided may differ depending on which functions are applicable to your vehicle.
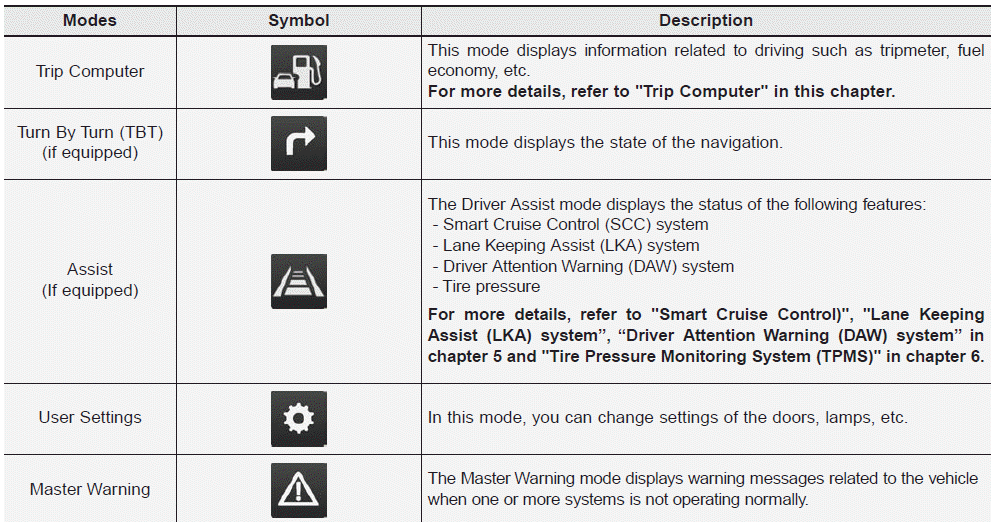
Trip computer, Turn By Turn (TBT) modes
Trip computer mode

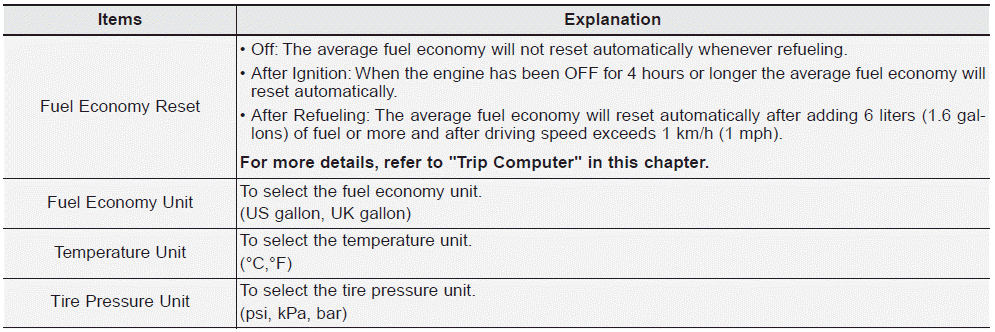
The trip computer mode displays information related to vehicle driving parameters including range, fuel economy, trip meter information and vehicle speed.
For more details, refer to "Trip Computer" in this chapter.
Turn By Turn (TBT) mode
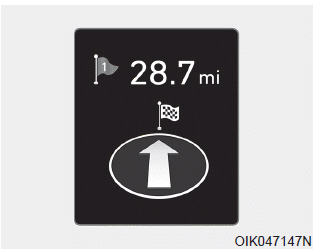
This mode displays the state of the navigation.
Assist mode & Master warning modes
Assist mode
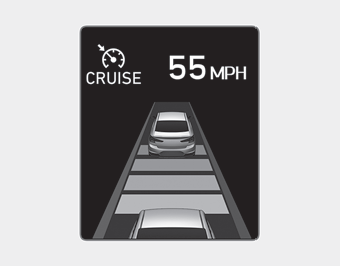
SCC/LKA/DAW
This mode displays the state of the Smart Cruise Control (SCC), Lane Keeping Assist (LKA) and Driver Attention Warning (DAW).
For more details, refer to each system information in chapter 5.
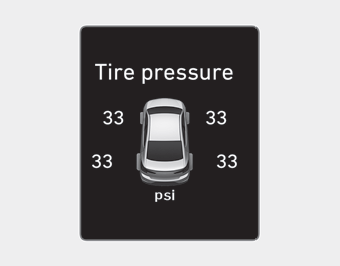
Tire Pressure
This mode displays information related to Tire Pressure.
For more details, refer to "Tire Pressure Monitoring System (TPMS)" in chapter 6.
Master warning mode
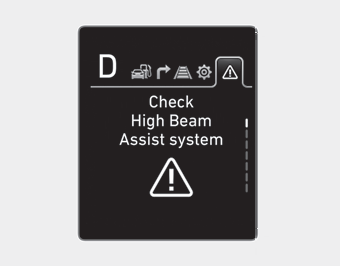
This warning light informs the driver the following situations.
- Forward Collision-Avoidance Assist system malfunction (if equipped)
- Forward Collision-Avoidance Assist radar blocked (if equipped)
- Blind-Spot Collision Warning system malfunction (if equipped)
- Blind-Spot Collision Warning radar blocked (if equipped)
- Smart Cruise Control malfunction (if equipped)
- Lamp malfunction
- High Beam Assist malfunction (if equipped)
- Tire Pressure Monitoring System (TPMS) malfunction
The Master Warning Light illuminates if one or more of the above warning situations
occur. At this time, a Master Warning icon ( )
will appear beside the User Settings icon (
)
will appear beside the User Settings icon ( ),
on the LCD display.
),
on the LCD display.
If the warning situation is solved, the master warning light will be turned off and the Master Warning icon will disappear.
User settings mode
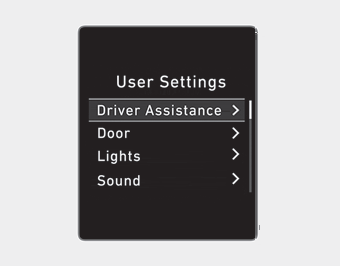
In this mode, you can change the settings of the instrument cluster, doors, lamps, etc.
1. Driver Assistance
2. Door
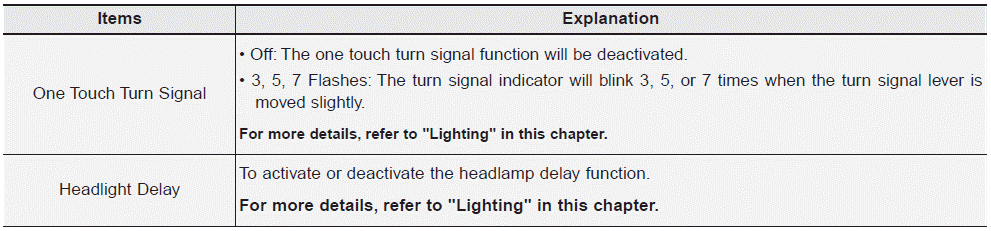
3. Lights
4. Sound
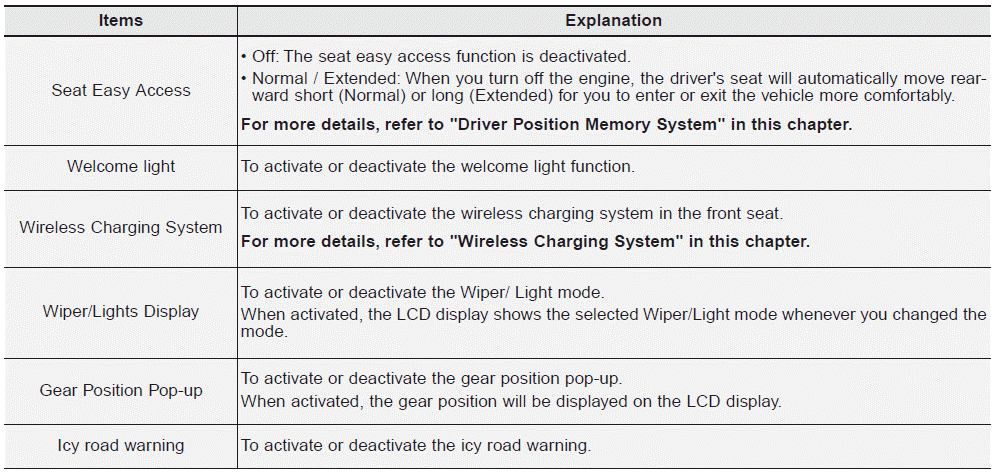
5. Convenience
6. Service interval
7. Other
8. Language
9. Reset
The information provided may differ depending on which functions are applicable to your vehicle.
Shift to P to edit settings/Engage parking brake to edit settings
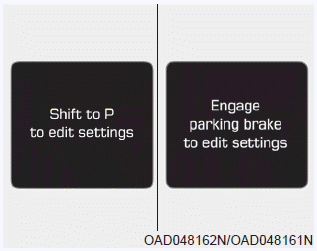
This warning message appears if you try to adjust the User Settings while driving.
Quick guide help
This mode provides quick guides for the systems in the User Settings mode.
Select an item, press and hold the OK button.
For more details, about each system, refer to this Owner's Manual.
Driver Assistance
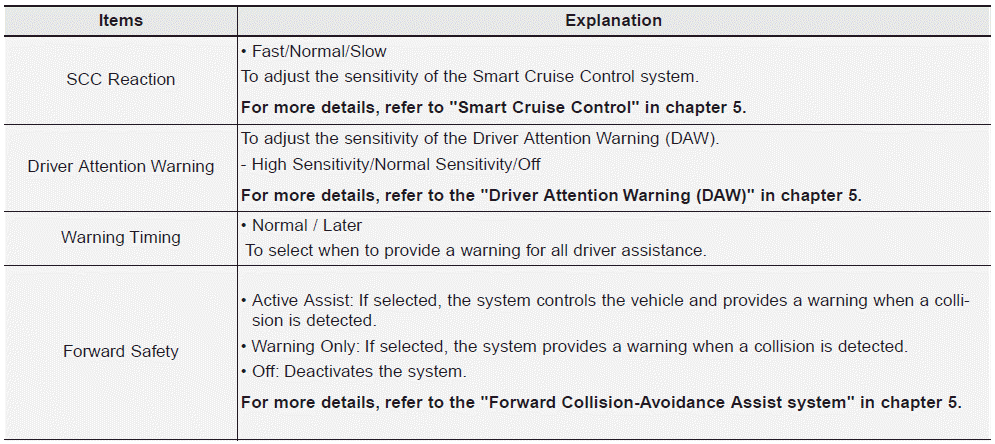
ŌØłThe information provided may differ depending on which functions are applicable to your vehicle.
Driver Assistance
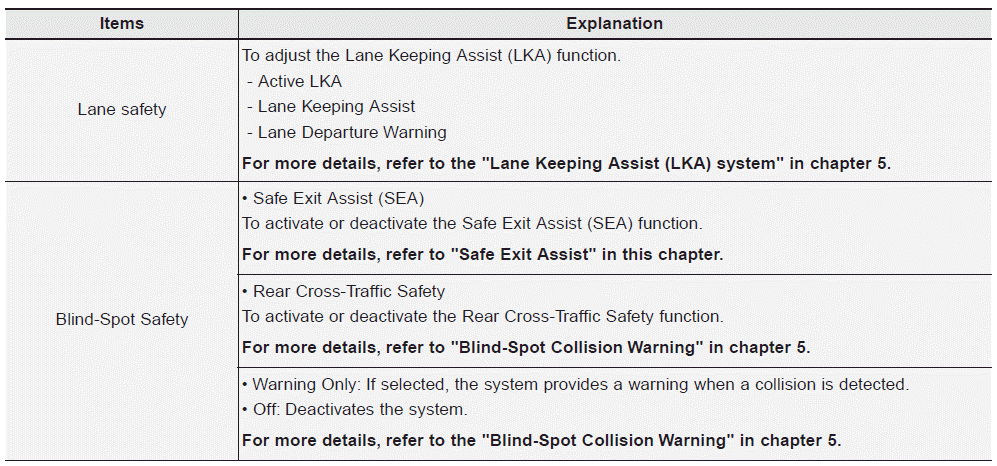
ŌØłThe information provided may differ depending on which functions are applicable to your vehicle.
Door
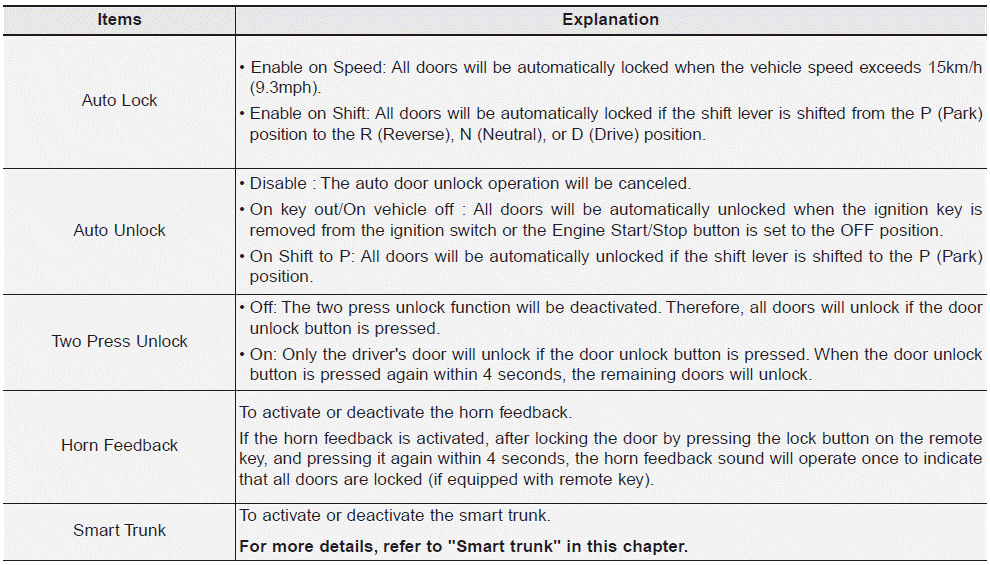
ŌØłThe information provided may differ depending on which functions are applicable to your vehicle.
Lights
Sound

Convenience
Service interval

If the service interval is activated and the time and distance is adjusted, messages are displayed in the following situations each time the vehicle is turned on.
- Service in: Displayed to inform the driver the remaining mileage and days to service.ąæą« - Service required: Displayed when the mileage and days to service has been reached or passed.
Information
If any of the following conditions occur, the mileage and number of days to service may be incorrect.
- The battery cable is disconnected.
- The fuse switch is turned off.
- The battery is discharged.
Other
Language

Reset
You can reset the menus in the User Settings Mode. All menus in the User Settings Mode are reset to factory settings, except language and service interval.
 LCD Display Messages
Shift to P or N to start engine (for smart key system and Intelligent Variable
Transmission (IVT)/dual clutch transmission)
This warning message is displayed if you try to start the engine with the ...
Other information:
Hyundai Elantra AD (2016-2020) Service Manual: Schematic Diagrams
Circuit Diagram
...
Hyundai Elantra AD (2016-2020) Service Manual: Fender
Components and Components Location
Component Location
1. Fender assembly
Repair procedures
Replacement
ŌĆó
When removing the fender, wrap protective tape around a screwdriver or remover not to damage components
ŌĆó
Put on gloves to prevent hand injuries
...
