Hyundai Elantra: Front Door / Front Door Window Glass Repair procedures
| Replacement |
| 1. |
Remove the front door trim.
(Refer to Front Door - "Front Door Trim") |
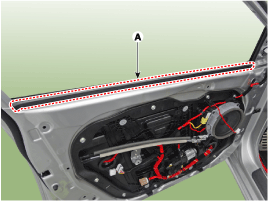
| 2. |
Remove the front door belt inside weatherstrip (A).
|
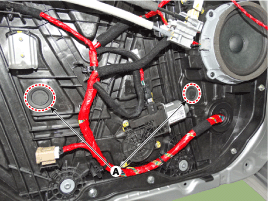
| 3. |
Separate the mounting plug hole (A) from the front door module.
|
| 4. |
Lower the glass by operating the power window switch until the glass mounting bolt is exposed in the plug hole.
|


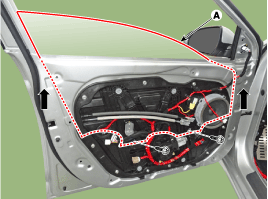
| 5. |
After loosening the glass mounting bolts, adjust the spacing
of the glass (A) by moving the glass from side to side and then tighten
the bolts.
|
| 6. |
To intall, reverse the removal procedure.
|
 Front Door Window Glass Components and Components Location
Component Location
1. Front door window glass
...
 Front Door Module Components and Components Location
Component Location
1. Front door module
...
Other information:
Hyundai Elantra AD (2016-2020) Owners Manual: Electronic Stability Control (ESC)
The Electronic Stability Control (ESC) system helps to stabilize the vehicle
during cornering maneuvers. ESC checks where you are steering and where the vehicle
is actually going. ESC applies braking pressure to any one of the vehicle's brakes
and intervenes in the engine management syst ...
Hyundai Elantra AD (2016-2020) Service Manual: Starter Relay Repair procedures
Inspection
1.
Turn ignition switch OFF and disconnect the negative (-) battery cable.
2.
Remove the fuse box cover.
3.
Remove the starter relay (A).
4.
Using an ohmmeter, check that there is continuity between each terminal.
TerminalContinuity30 - 87NO85 - 86YES
5.
Apply 12V ...
