Hyundai Elantra: Engine And Transaxle Assembly / Engine And Transaxle Assembly Repair procedures
Hyundai Elantra AD (2016-2020) Service Manual / Engine Mechanical System / Engine And Transaxle Assembly / Engine And Transaxle Assembly Repair procedures
| Removal |
|
|
| 1. |
Remove the engine cover.
(Refer to Engine And Transaxle Assembly - "Engine Cover") |
| 2. |
Remove the air duct and air cleaner assembly.
(Refer to Intake And Exhasut System - "Air Cleaner") |
| 3. |
Remove the battery.
(Refer to Engine Electrical System - "Battery") |
| 4. |
Remove the ECM (Engine Control Module).
(Refer to Engine Control / Fuel System - "Engine Control Module (ECM)") |
| 5. |
Remove the battery tray.
(Refer to Engine Electrical System - "Battery") |
| 6. |
Remove the engine room under cover.
(Refer to Engine And Transaxle Assembly - "Engine Room Under Cover") |
| 7. |
Drain the engine coolant.
(Refer to Cooling System - "Coolant") |
| 8. |
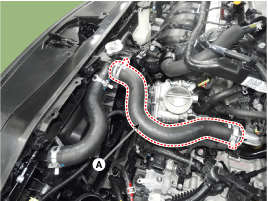
Disconnect the radiator upper hose (A).
|
| 9. |
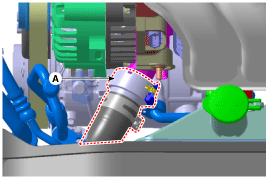
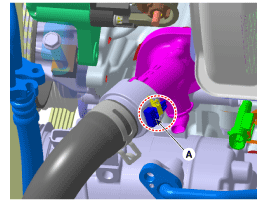
Disconnect the Radiator lower hose quick connector (A).
|
| 10. |
Recover the refrigerant and then remove the high pressure pipe and low pressure pipe.
(Refer to Heating, Ventilation Air conditioning - "Compressor") |
| 11. |
Remove the transaxle wire harness connectors and control cable from the transaxle.
(Refer to Automatic Transaxle System - "Automatic Transaxle") |
| 12. |
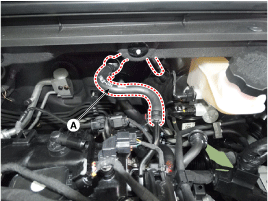
Disconnect the brake booster vacuum hose (A).
|
| 13. |
Disconnect the heater hoses (A).
|
| 14. |
Disconnect the fuel hose (A) and the purge control solenoid valve (PCSV) hose (B).
|
| 15. |
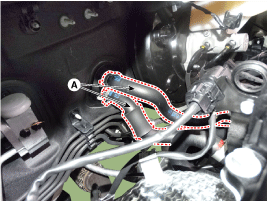
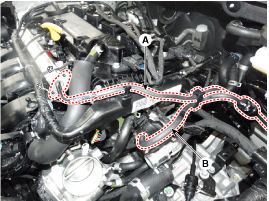
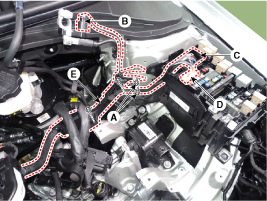
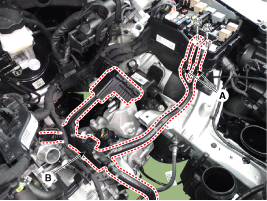
Disconnect the wiring harness from the engine room.
|
| 16. |
Remove the front muffler.
(Refer to Intake And Exhaust System - "Muffler") |
| 17. |
Remove the steering U-joint mounting bolts.
(Refer to Steering System - "Steering Column and Shaft") |
| 18. |
Remove the roll rod bracket (A).
|
| 19. |
Remove the roll rod mounting support bracket (A).
|
| 20. |
Remove the sub frame.
(Refer to Suspension system - "Sub frame") |
| 21. |
Support the engine and transaxle assembly with a floor jack. |
| 22. |
Disconnect the ground cable (A).
|
| 23. |
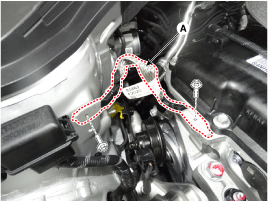
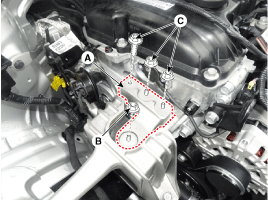
Remove the engine mounting support bracket (A).
|
| 24. |
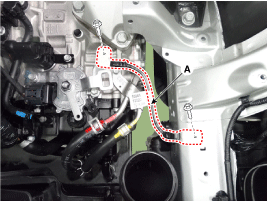
Disconnect the ground line (A).
|
| 25. |
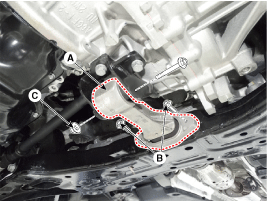
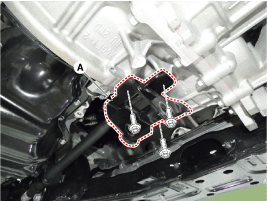
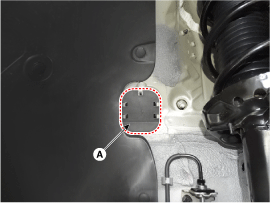
Remove the service cover (A).
|
| 26. |
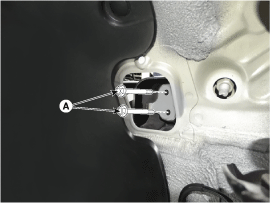
Remove the transaxle support bracket mounting bolts (A).
|
| 27. |
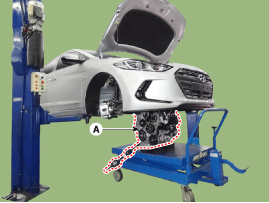
Remove the engine and transaxle assembly by lifting vehicle.
|
| Installation |
Installation is in the reverse order of removal.
Perform the following :
| • |
Adjust shift cable. |
| • |
Adjust throttle cable. |
| • |
Refill engine with engine oil. |
| • |
Refill transaxle with fluid. |
| • |
Refill radiator and reservoir tank with engine coolant. |
| • |
Place heater control knob on "HOT" position. |
| • |
Bleed air from the cooling system. |
| - |
(Refer to Cooling System - "Coolant") |
| • |
Clean battery posts and cable terminals with sandpaper assemble them, then apply grease to prevent corrosion. |
| • |
Inspect for fuel leakage. |
| - |
After assemble the fuel line, turn on the ignition switch (do
not operate the starter) so that the fuel pump runs for approximately
two seconds and fuel line pressurizes. |
| - |
Repeat this operation two or three times, then check for fuel leakage at any point in the fuel line. |
 Engine Mounting Repair procedures
Removal and Installation
Engine Mounting Bracket
1.
Remove the engine room under cover.
(Refer to Engine And Transaxle Assembly - "Engine Room Under Cover")
2.
Install the jack under the edg ...
 Timing System
...
Other information:
Hyundai Elantra AD (2016-2020) Owners Manual: Interior Care
Interior general precautions
Prevent caustic solutions such as perfume and cosmetic oil, from contacting the
interior parts because they may cause damage or discoloration. If they do contact
the interior parts, wipe them off immediately. See the instructions for the proper
way to clean vinyl. ...
Hyundai Elantra AD (2016-2020) Service Manual: Fuel Line Repair procedures
Removal
1.
Turn the ignition switch OFF, and then remove battery (-) cable.
2.
Release the residual pressure in fuel line.
(Refer to Fuel Delivery System - "Release Residual Pressure in Fuel Line")
3.
Disconnect the fuel feed quick-connector (A).
4.
Disconnect the vapor hose (A) wh ...
© 2018-2026 www.helantraad.com


